

Flodesk Tutorial for Beginners 2026 (the ONLY setup guide you need!)
In this ultimate Flodesk tutorial for beginners, you’ll learn the step-by-steps to set up and start email marketing in under 30 minutes!
If you’ve just signed up for Flodesk* or thinking about using it as your email marketing platform, and you have no idea where to start, this is the perfect tutorial for beginners!
You’ll learn how to set up your Flodesk account (including email and domain verification), create a sign up form and add it to your website to start collecting email subscribers, plus how to create a freebie lead magnet automated workflow and your first email newsletter.
Table of Contents
*Disclaimer: This post contains affiliate links where I get a small commission if you make a purchase, so thank you in advance for your support! Please know I would never recommend anything that I don’t personally LOVE myself.
Watch the video below for the tutorial or keep scrolling to read:
Is Flodesk worth the money?
Yes! As someone who has been email marketing for various companies (including my own) for over 12 years, I can safely say that Flodesk* is the easiest, most intuitive email marketing platform that creates the most beautiful emails with ease.
I’ve been using it and recommending it to my website design clients since 2019, and they’ve added so many amazing tools and features to the software since then!
With plans starting at around ~$28 per month (which includes EVERYTHING you need for your email marketing), I definitely think Flodesk is worth the money.
Before you set up your Flodesk account…
Have your own custom domain
In order to run an email newsletter, you need to have a custom domain (eg. byrosanna.co.uk) so that you can create a ‘branded’ email address that uses that domain (see below).
Have a ‘branded’ email set up with that domain
Due to anti-spam regulations and the way that inboxes work nowadays, you need to be sending your email marketing newsletters from a ‘branded’ email address - NOT a generic, unbranded one.
✅ Branded, domain-based email address = contact@byrosanna.co.uk
❌ Unbranded, generic email address = byrosanna123@gmail.com
get your brand visuals ready
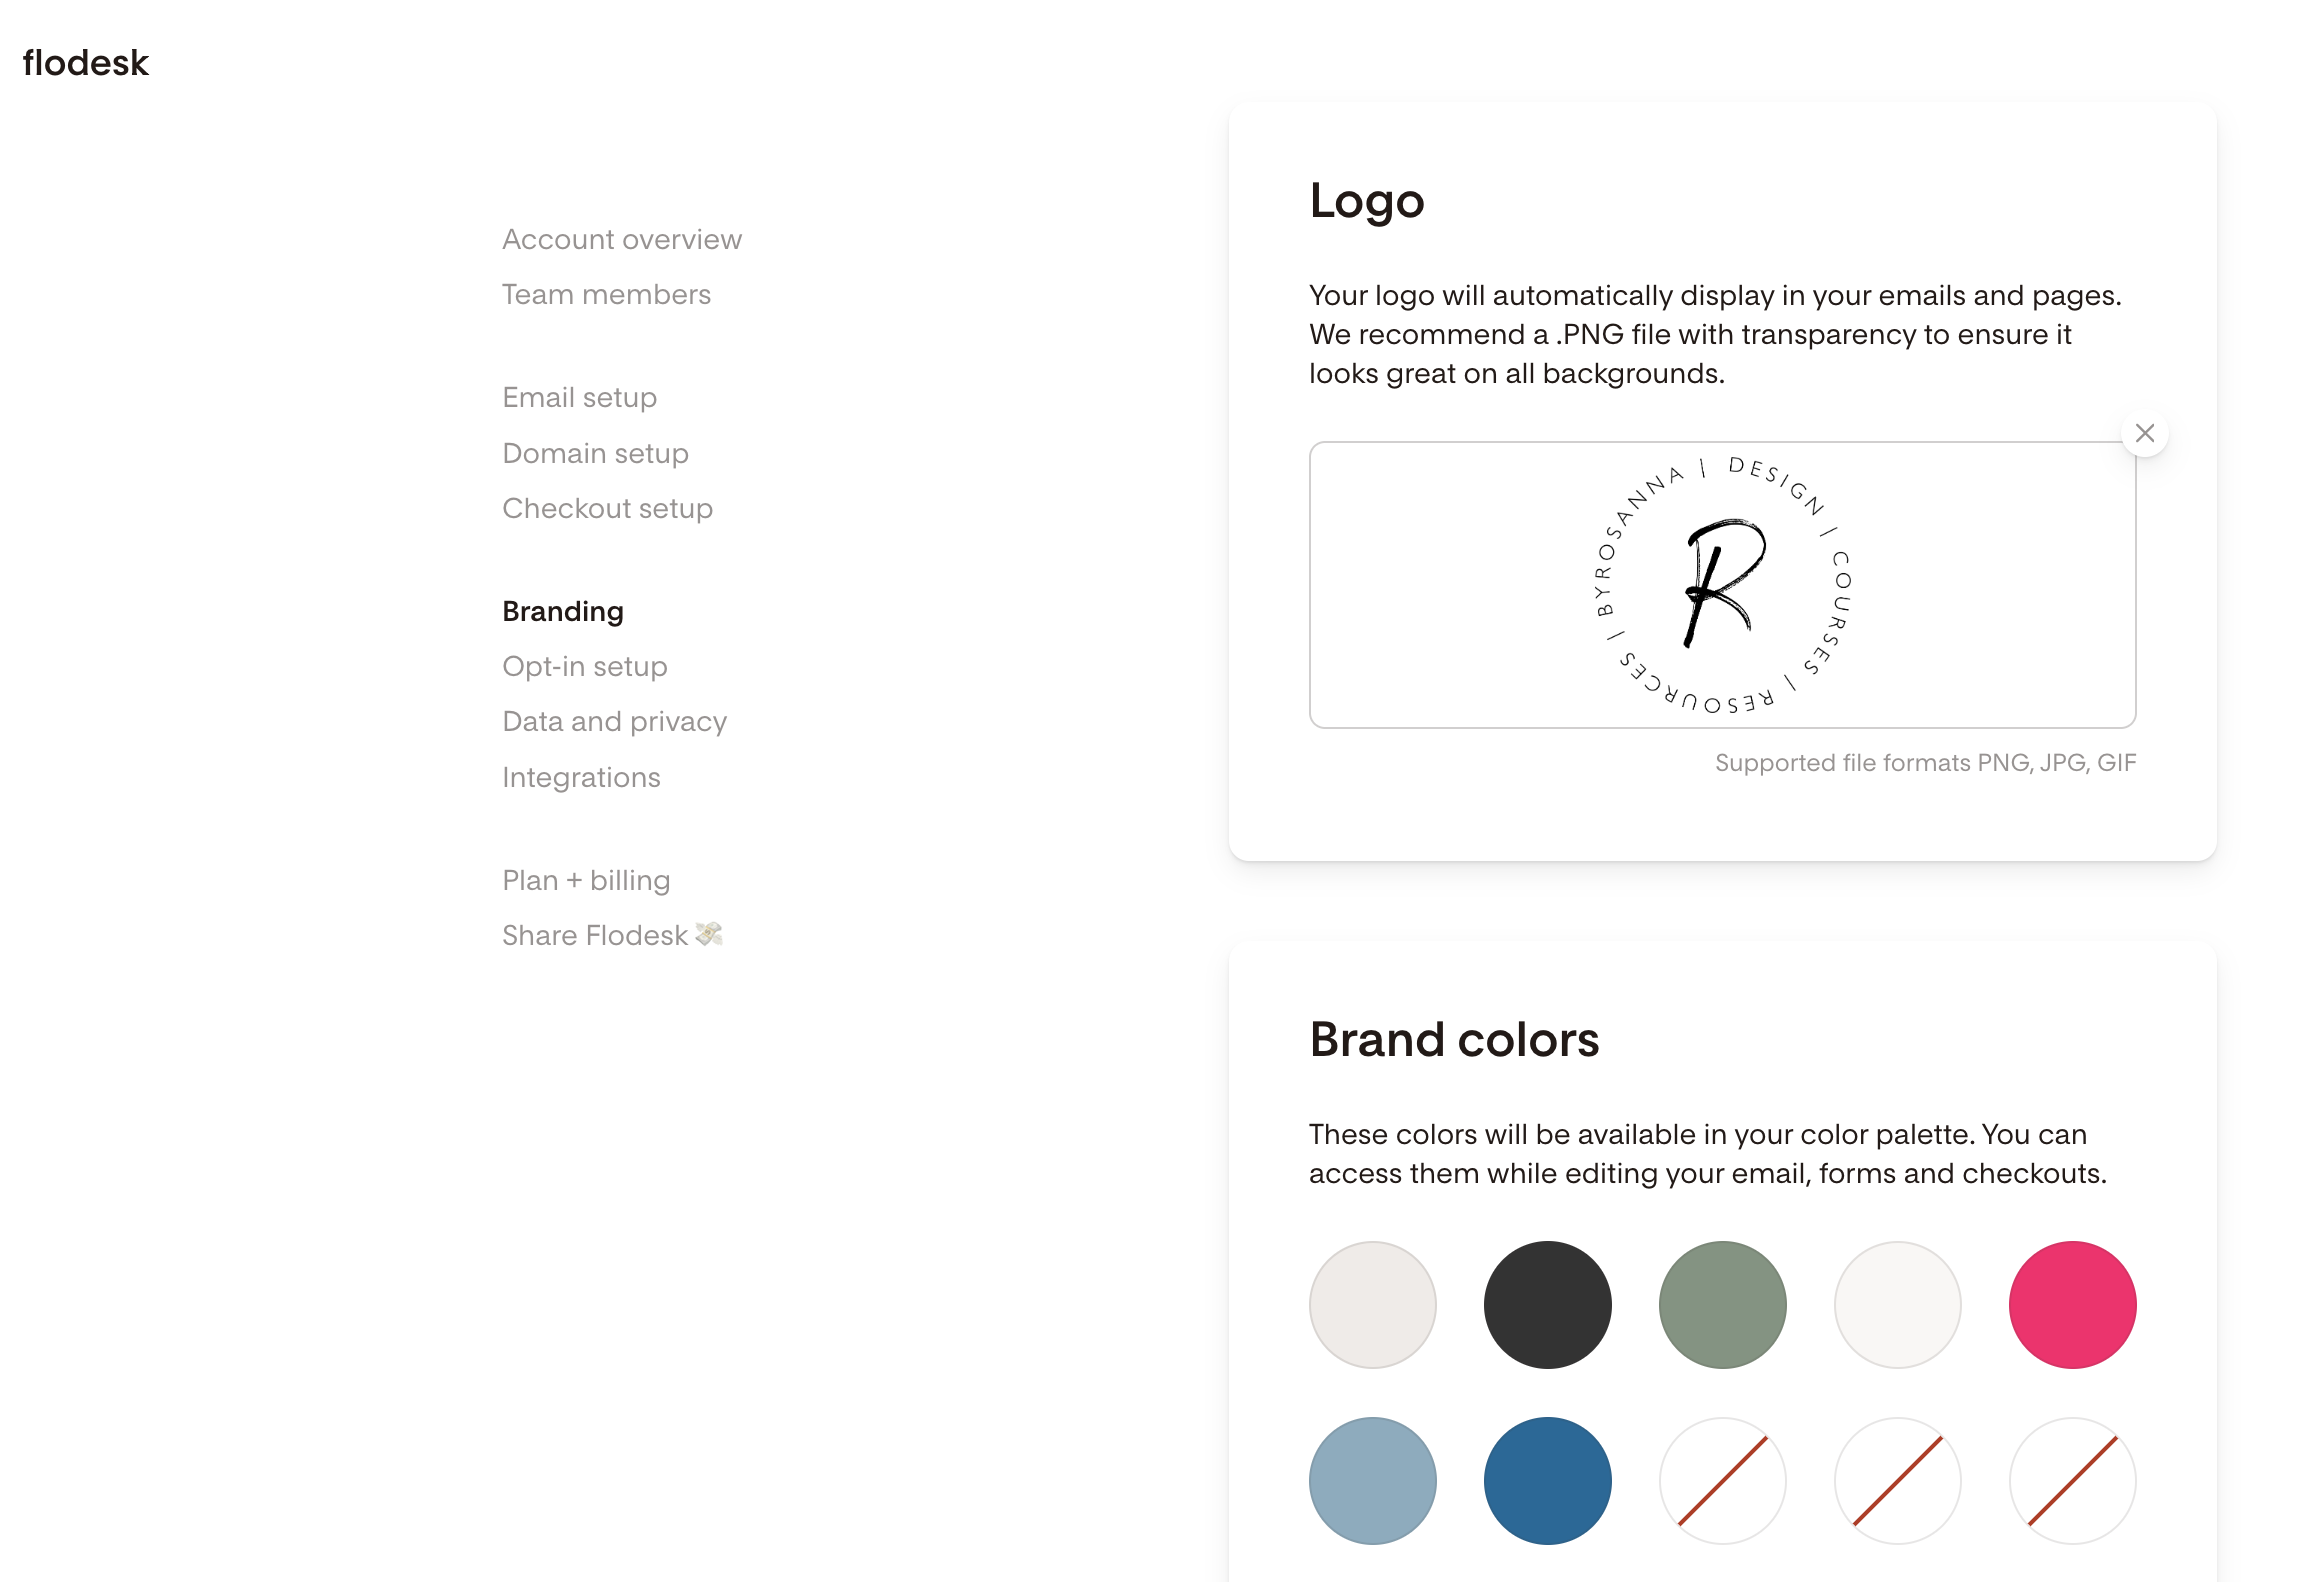
To ensure your email newsletter, sign up forms and website all look consistently branded and recognisable as YOU, have your brand logo, colour palette and brand fonts at the ready to add to your Flodesk settings.
create a ‘freebie’ opt-in incentive (optional but recommended!)
Why would someone want to hand their email address over to a form that just says ‘Join my newsletter’? There’s no INCENTIVE here and it’s not clear what they get in return or what they can expect from joining your email list. Therefore it’s much better to create what’s called an ‘opt-in incentive’ (aka a lead magnet), to encourage people to sign up.
These can look like really specific, relevant email series, free template or resource downloads, free trainings, or (for product-based businesses) discount codes!
How to set up your Flodesk account
Sign up for an account (use my link for 25% off!)
Sign up for a new Flodesk account* using my link and this will let you get set up for free, then when you’re ready to start sending emails you can upgrade to the paid plan with 25% off your first year by using my link or the code below at the checkout :)
00G2QH
When you sign up, use your branded email address (mentioned above, eg. contact@byrosanna.co.uk) to set up your account as this makes it easier with your settings later on!
Account settings
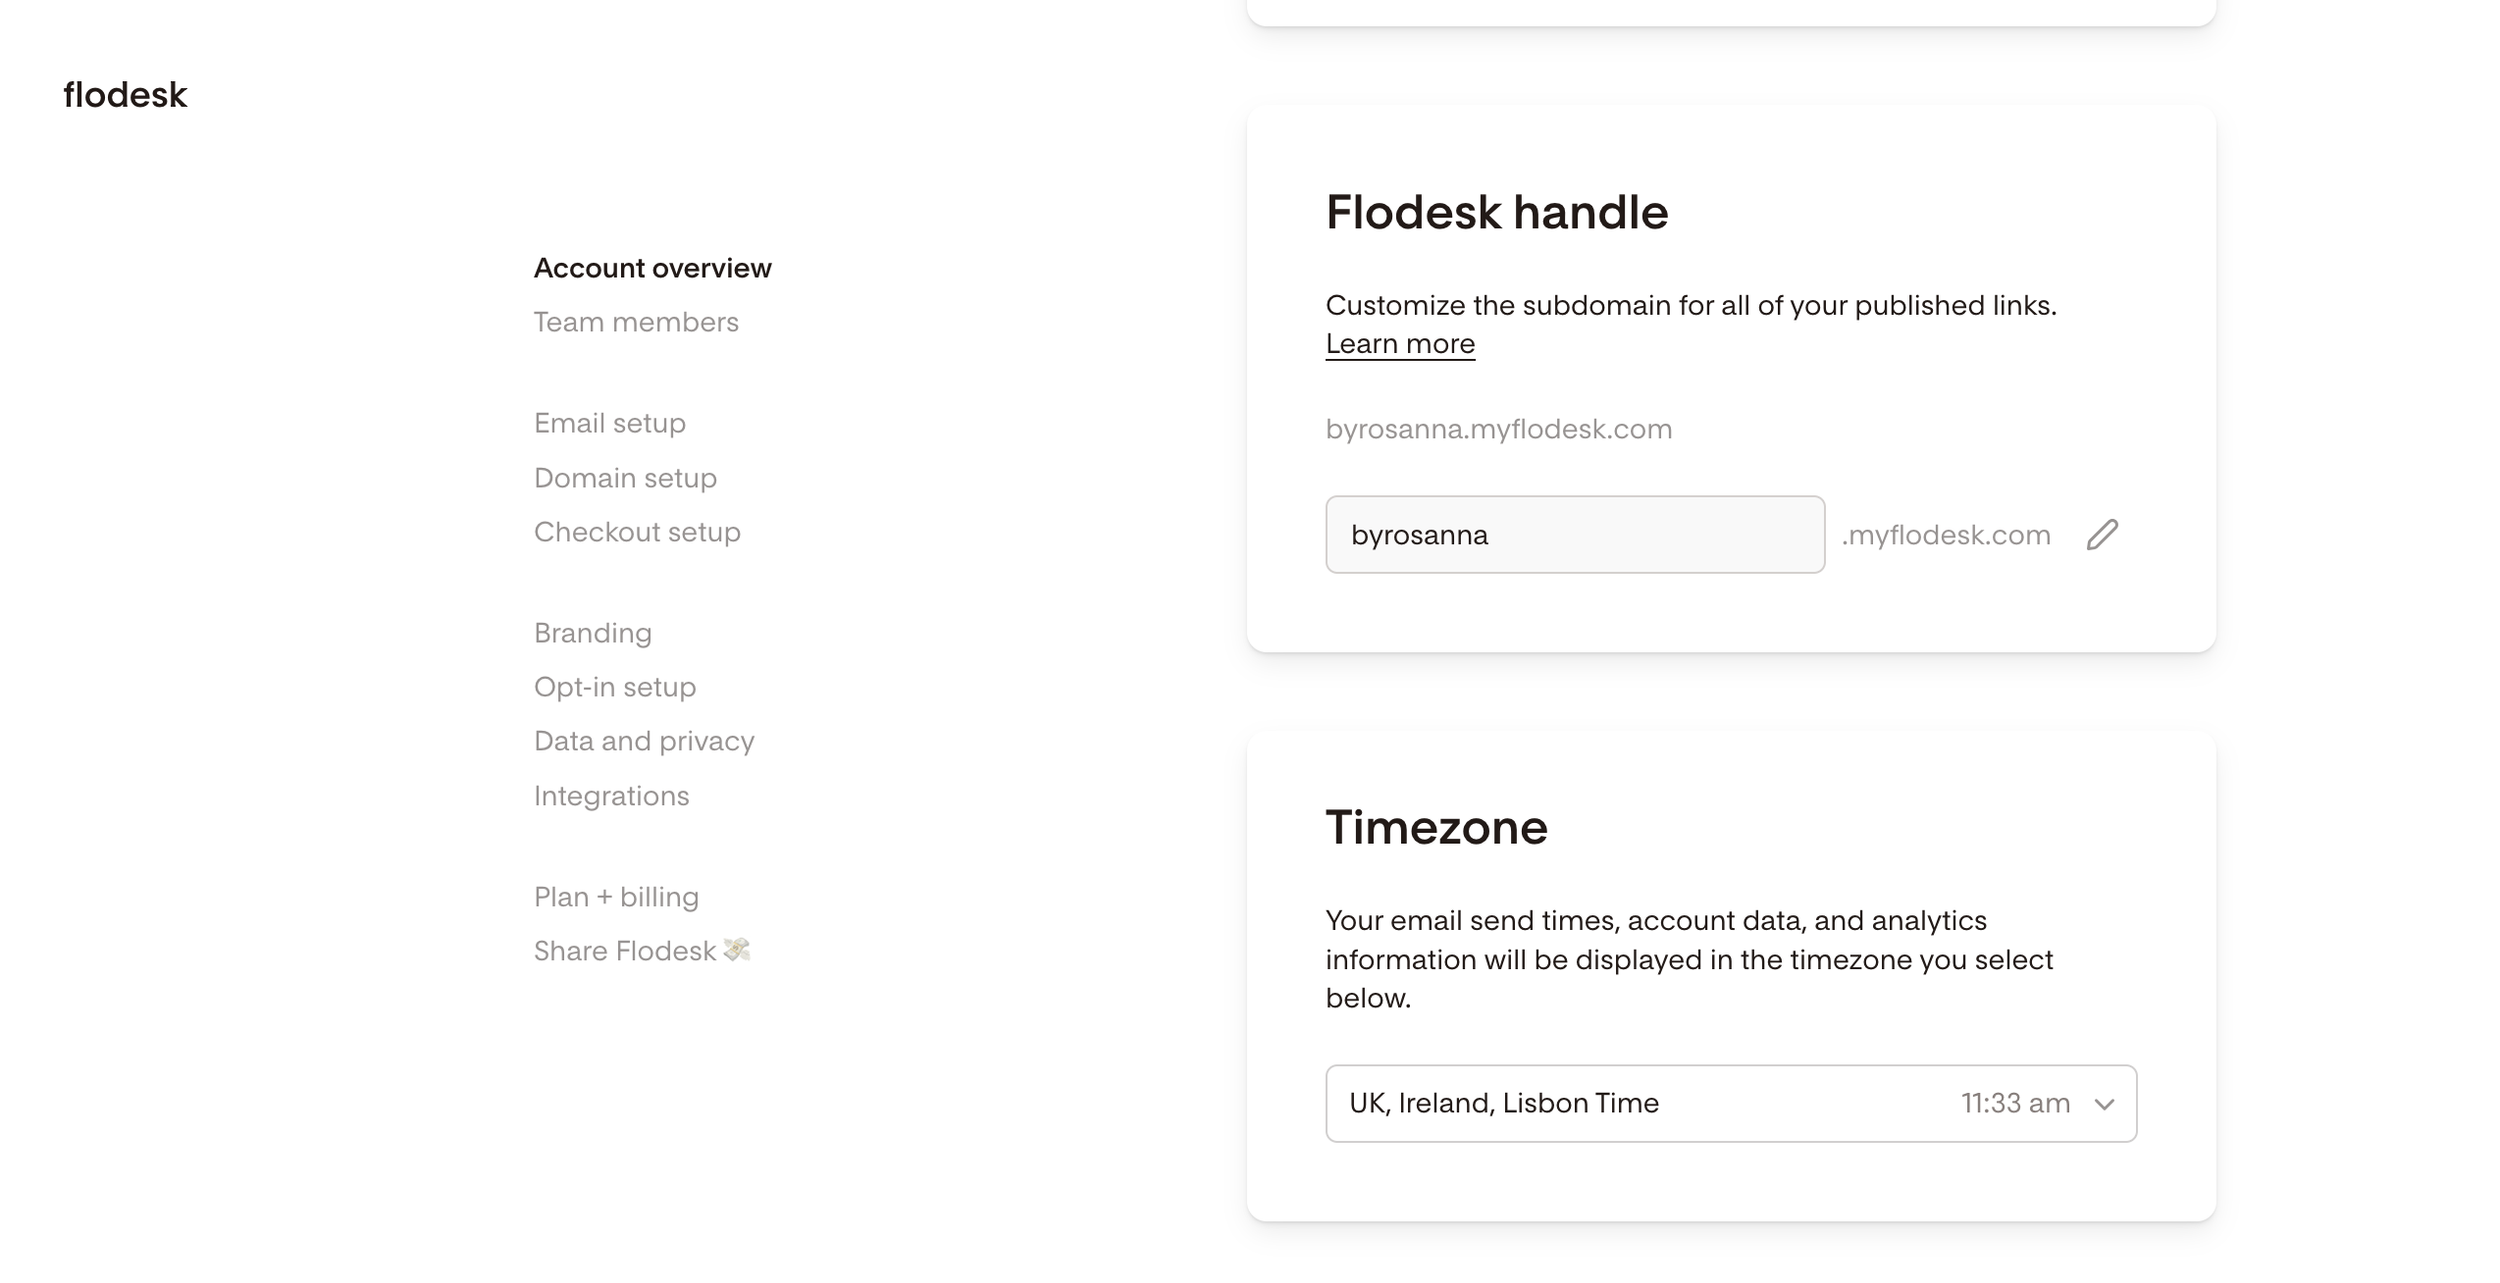
Add your name, Flodesk handle (this customises any landing page links you create), your timezone and add Multi-factor authentication to your account to make it secure.
Authenticate your email & domain
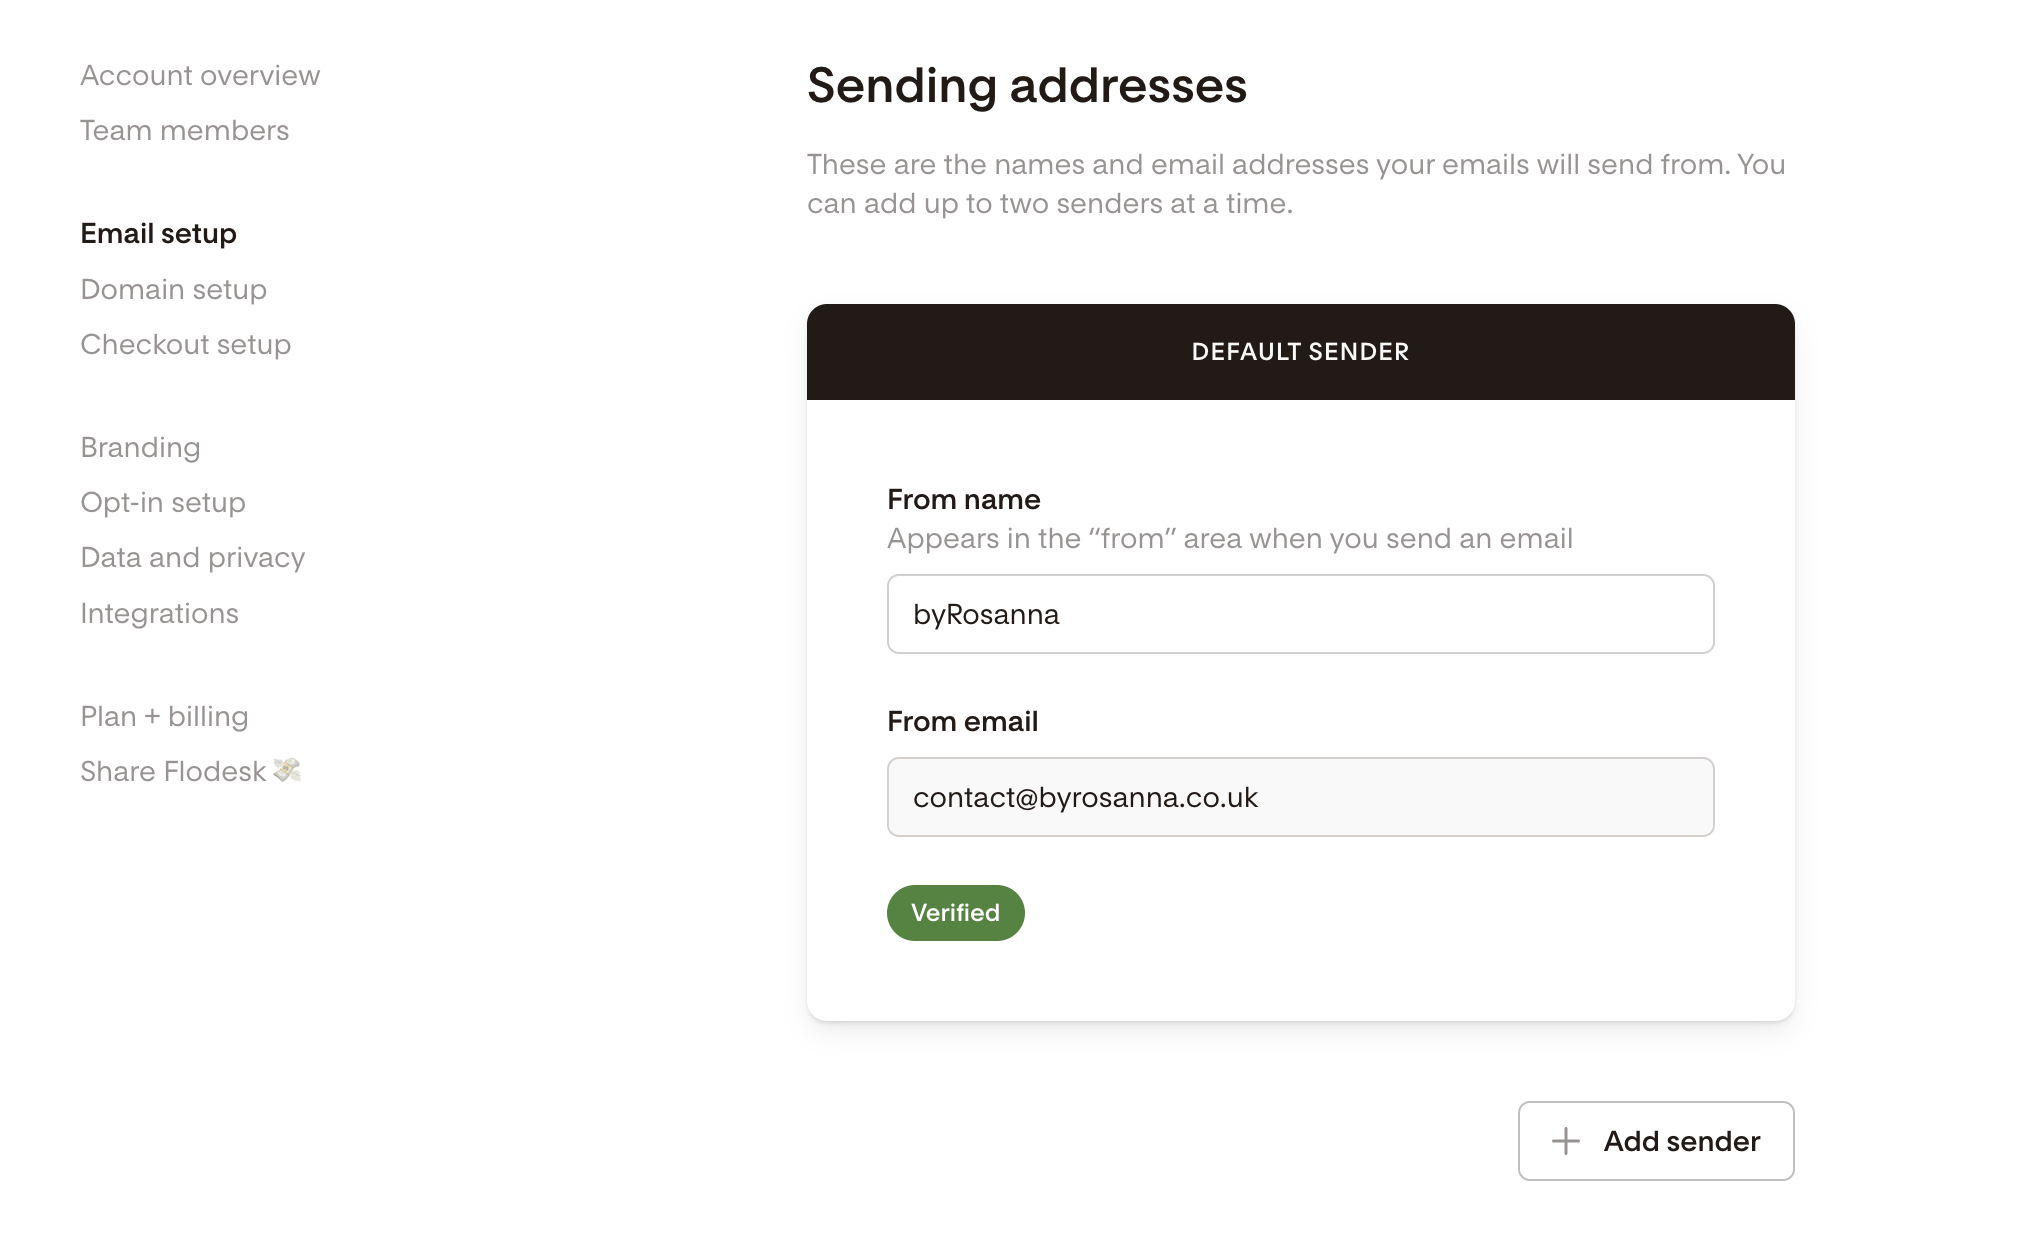
In Email Setup, ensure you have your branded email address (eg. contact@byrosanna.co.uk) set up as the default sender (if it’s not here already, click ‘add sender’ and make it the default sender once added).
Check your inbox for a verification email to prove you own this email address and click the link, and it should then show as ‘verified’ here.
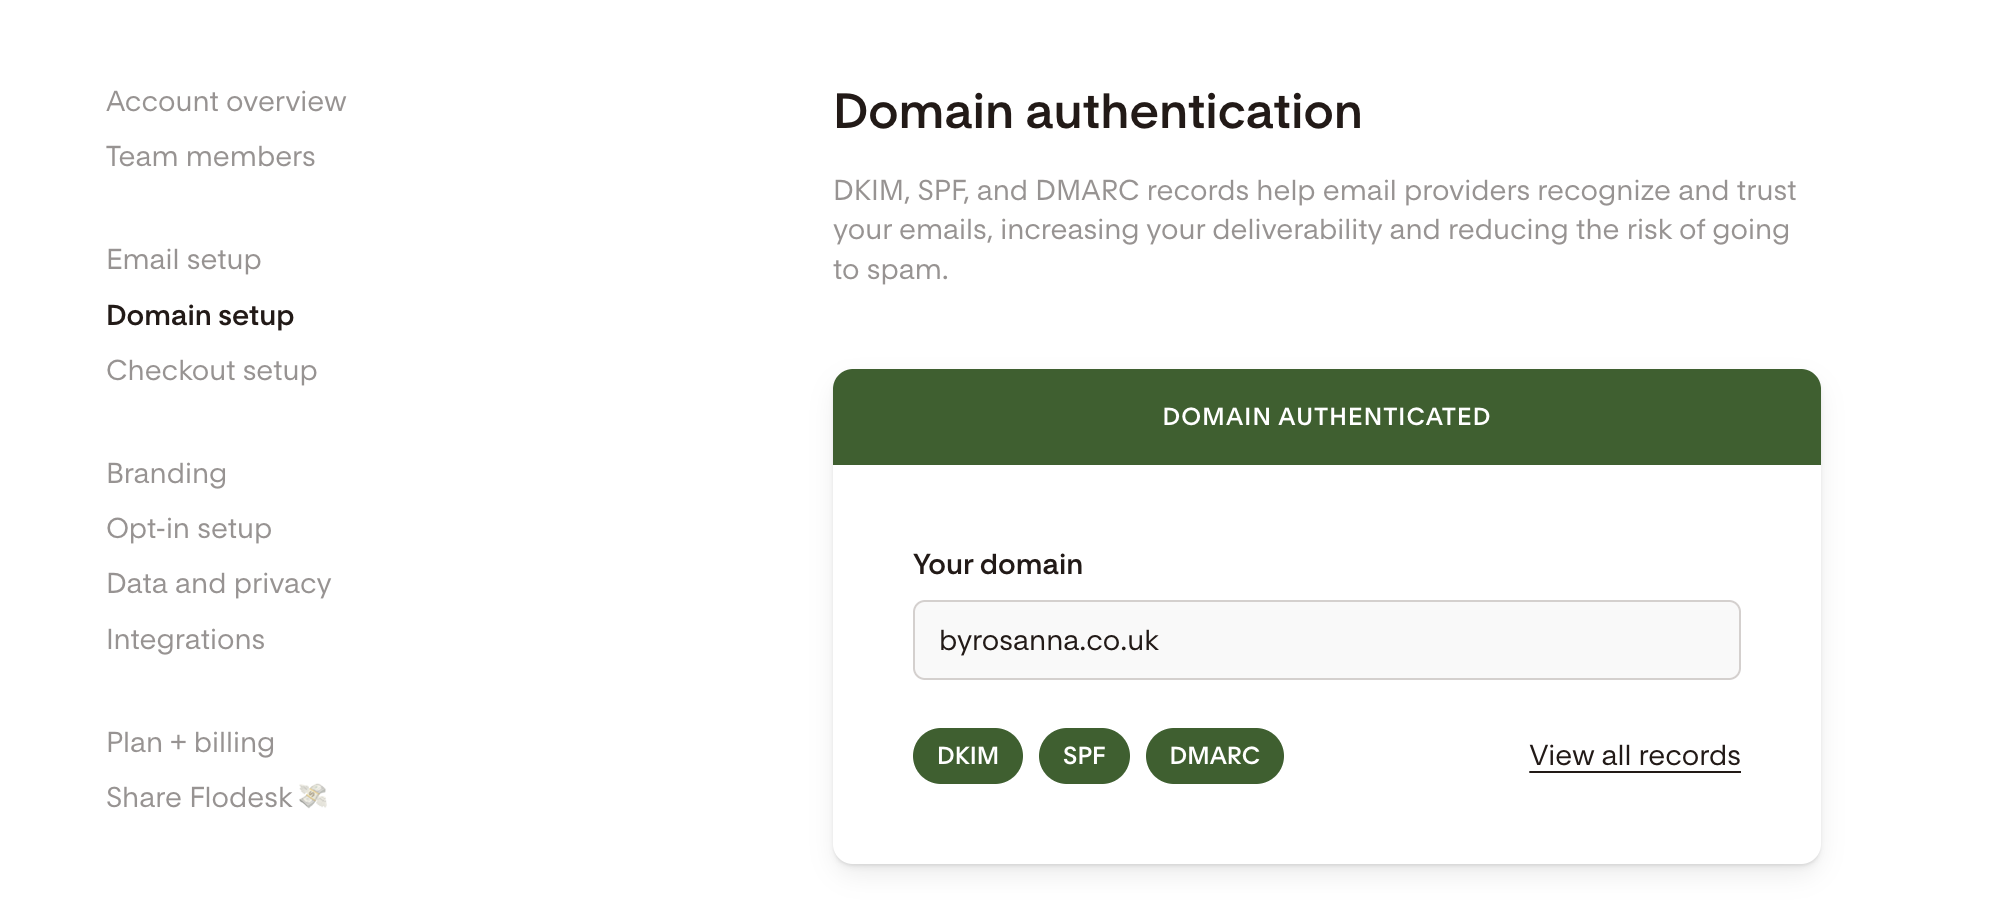
In Domain Setup, the domain that shows up here should be the one related to your branded email address (eg. byrosanna.co.uk) (if not - go back to Email Setup and follow my instructions above!).
You need to authenticate this domain (this tells inboxes that your business is trustworthy and ensures your email newsletters don’t go into spam!) by clicking ‘authenticate’ and choose ‘automatic’. Flodesk will then walk you through the steps to automatically add some DNS records to your domain.
If the automatic authentication doesn’t work, check out my full manual domain authentication for Flodesk tutorial.
branding
Add all your brand details here including logo, colour palette hex codes, brand fonts, address etc.
Ensure you’re compliant
Adding your business address is unfortunately a legal requirement when sending email newsletters (even if you’re not a registered company). If you’re worried about this you could look into creating a PO Box.
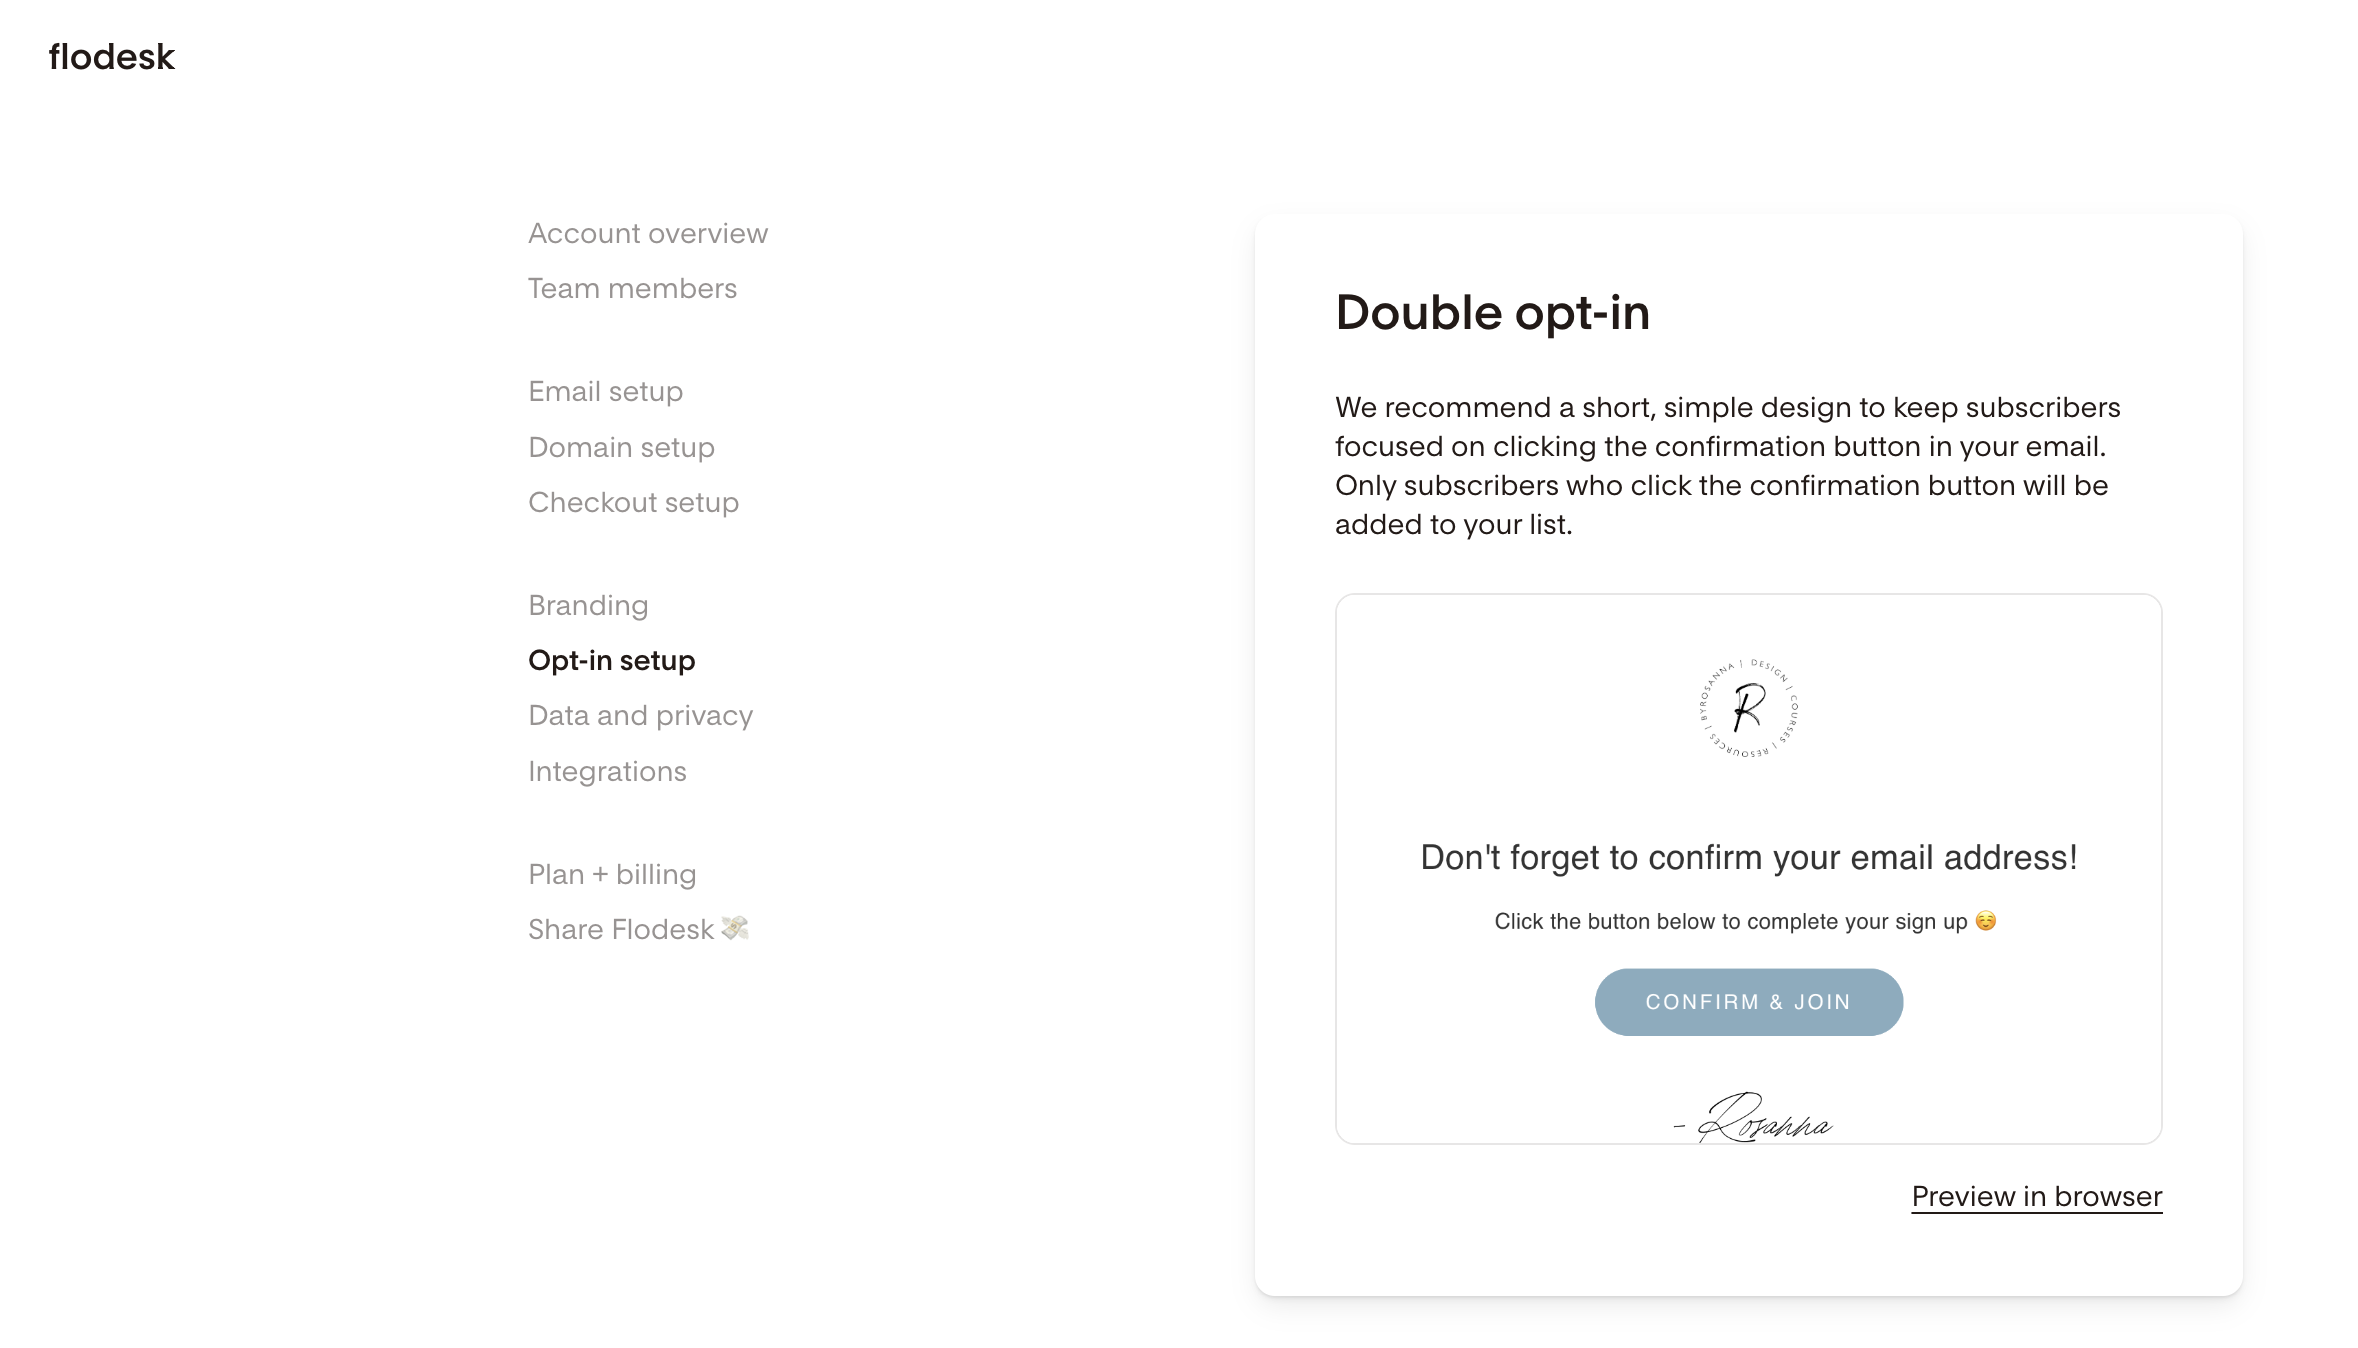
Set up your ‘Double Opt In’ email and thank you page, as this gets sent to subscribers automatically when they sign up to ensure their email address is correct.
Add your Privacy Policy, or use Flodesk’s template to customise
How to embed a Flodesk form on your website (and start collecting subscribers!)
step 1. create a segment in ‘audience’ for your form or freebie
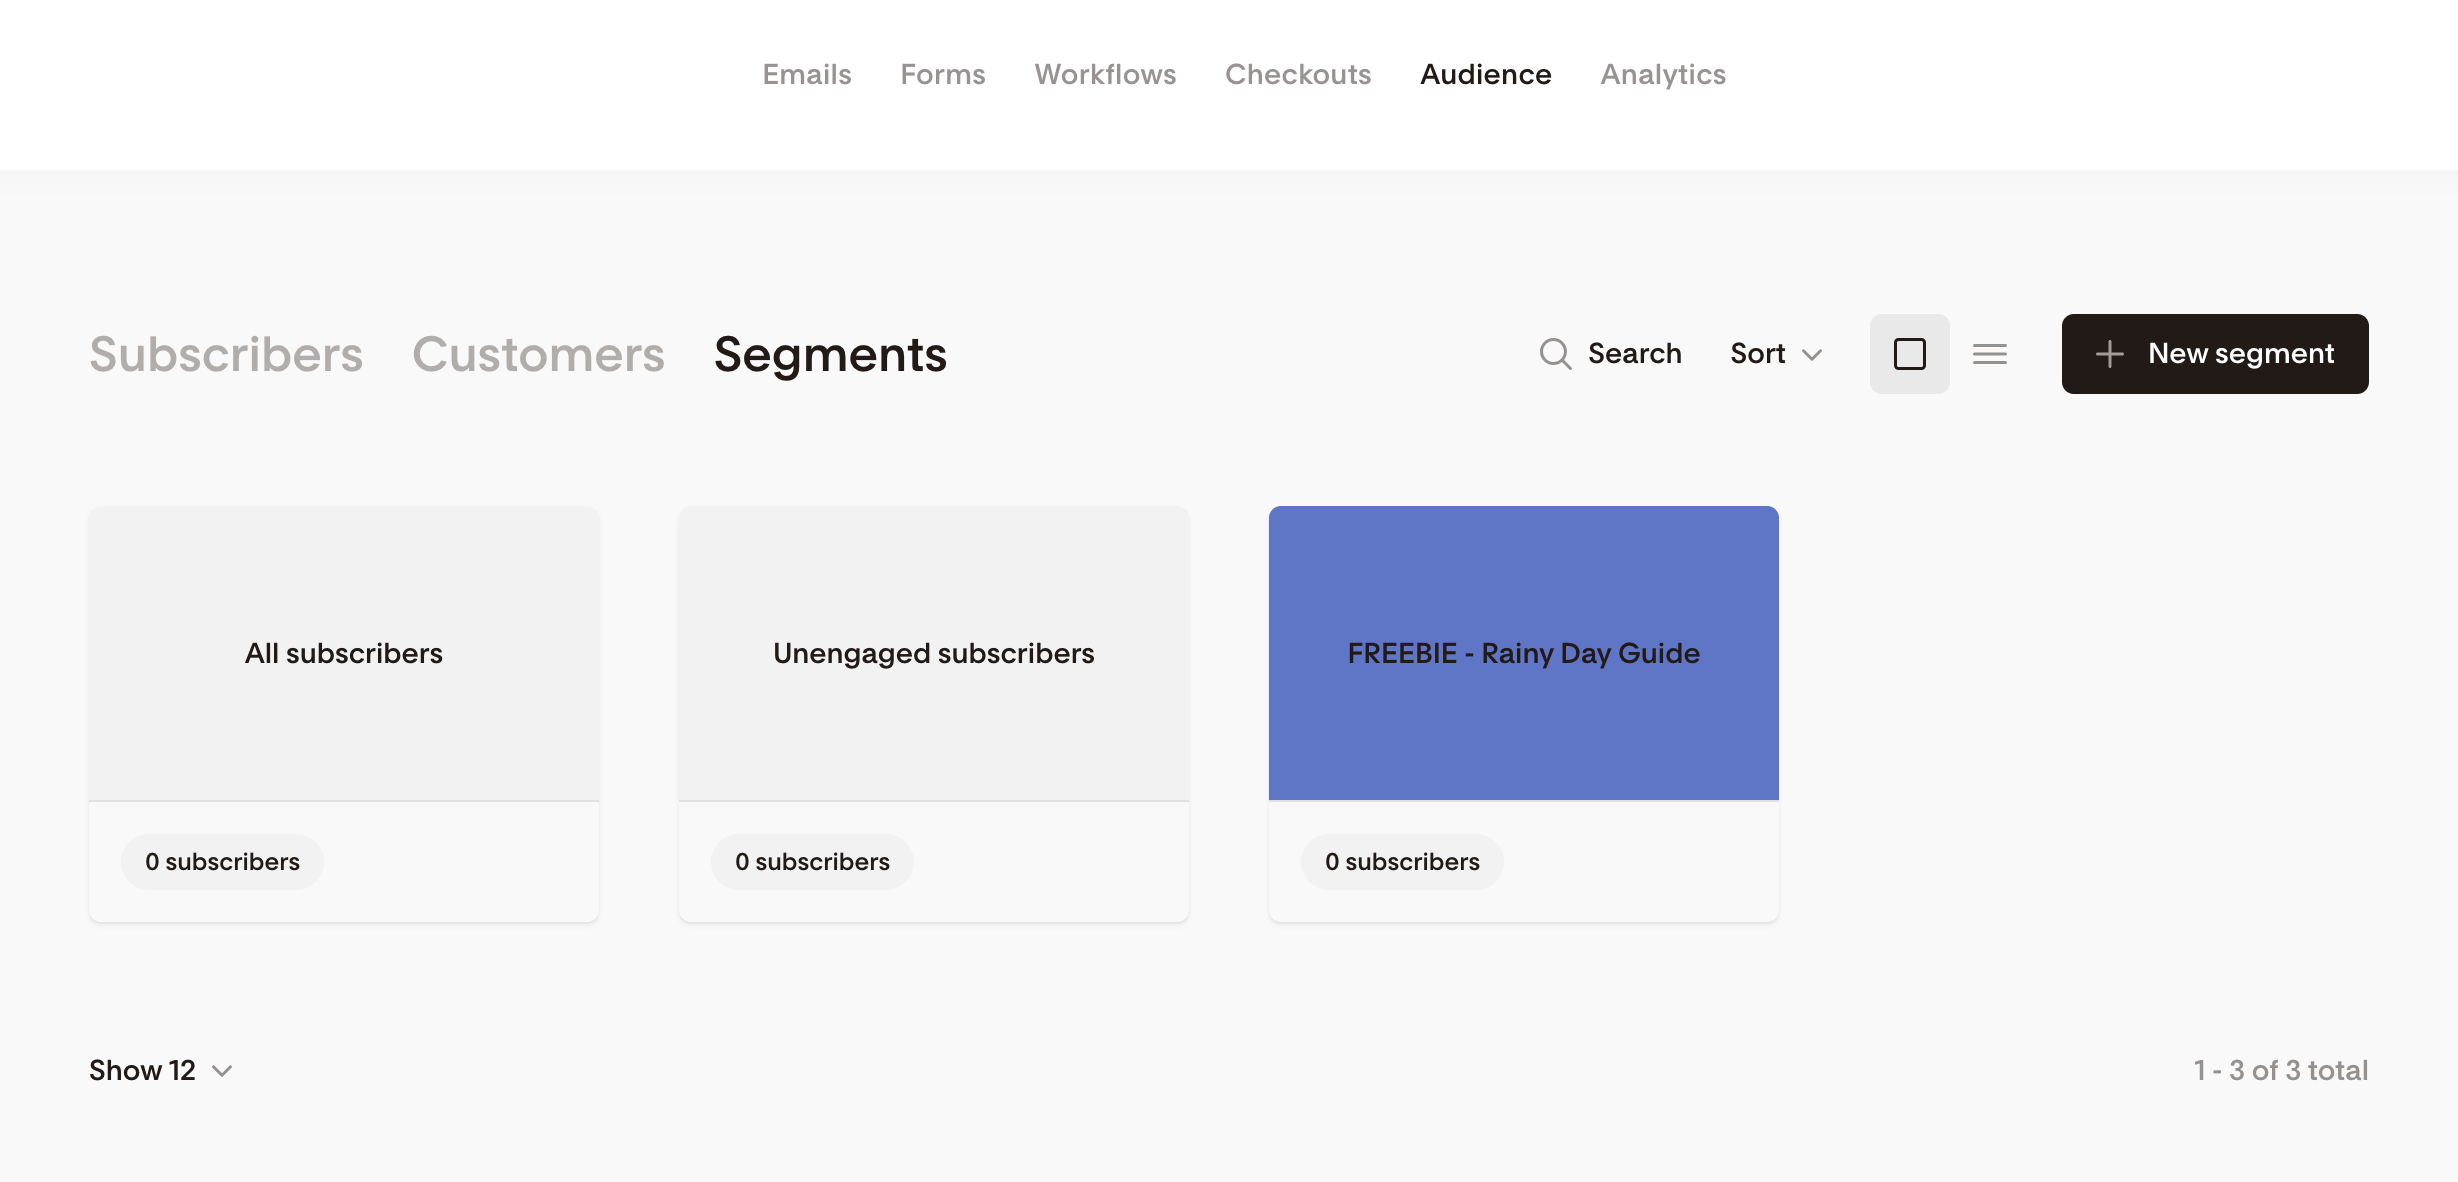
Segments help you to organise your subscribers (and allows you to tailor exactly who you send emails to later on as well); you can create as many as you want for different purposes. Eg. For different lead magnets, different interests, different customers, or what ‘warmth’ of lead they are etc.
Go to Audience > Segments and create a new segment. Name it after your opt-in incentive/lead magnet freebie (eg. ‘FREEBIE - Rainy Day Guide’) - choose whatever colour you like (these are just for your reference).
step 2. Create a new sign up form
Go to Forms and Create a New Form. There are loads of different types of forms you can create (some don’t even require you to have a website!), but if you want to add one to your website, choose ‘Inline Forms’ and select a template to customise.
Choose the segment we just created as the form segment. This means that anyone who signs up to this form will automatically be added to this segment. (They will also automatically get added to the ‘All Subscribers’ segment, but you don’t need to set this up - that happens by default).
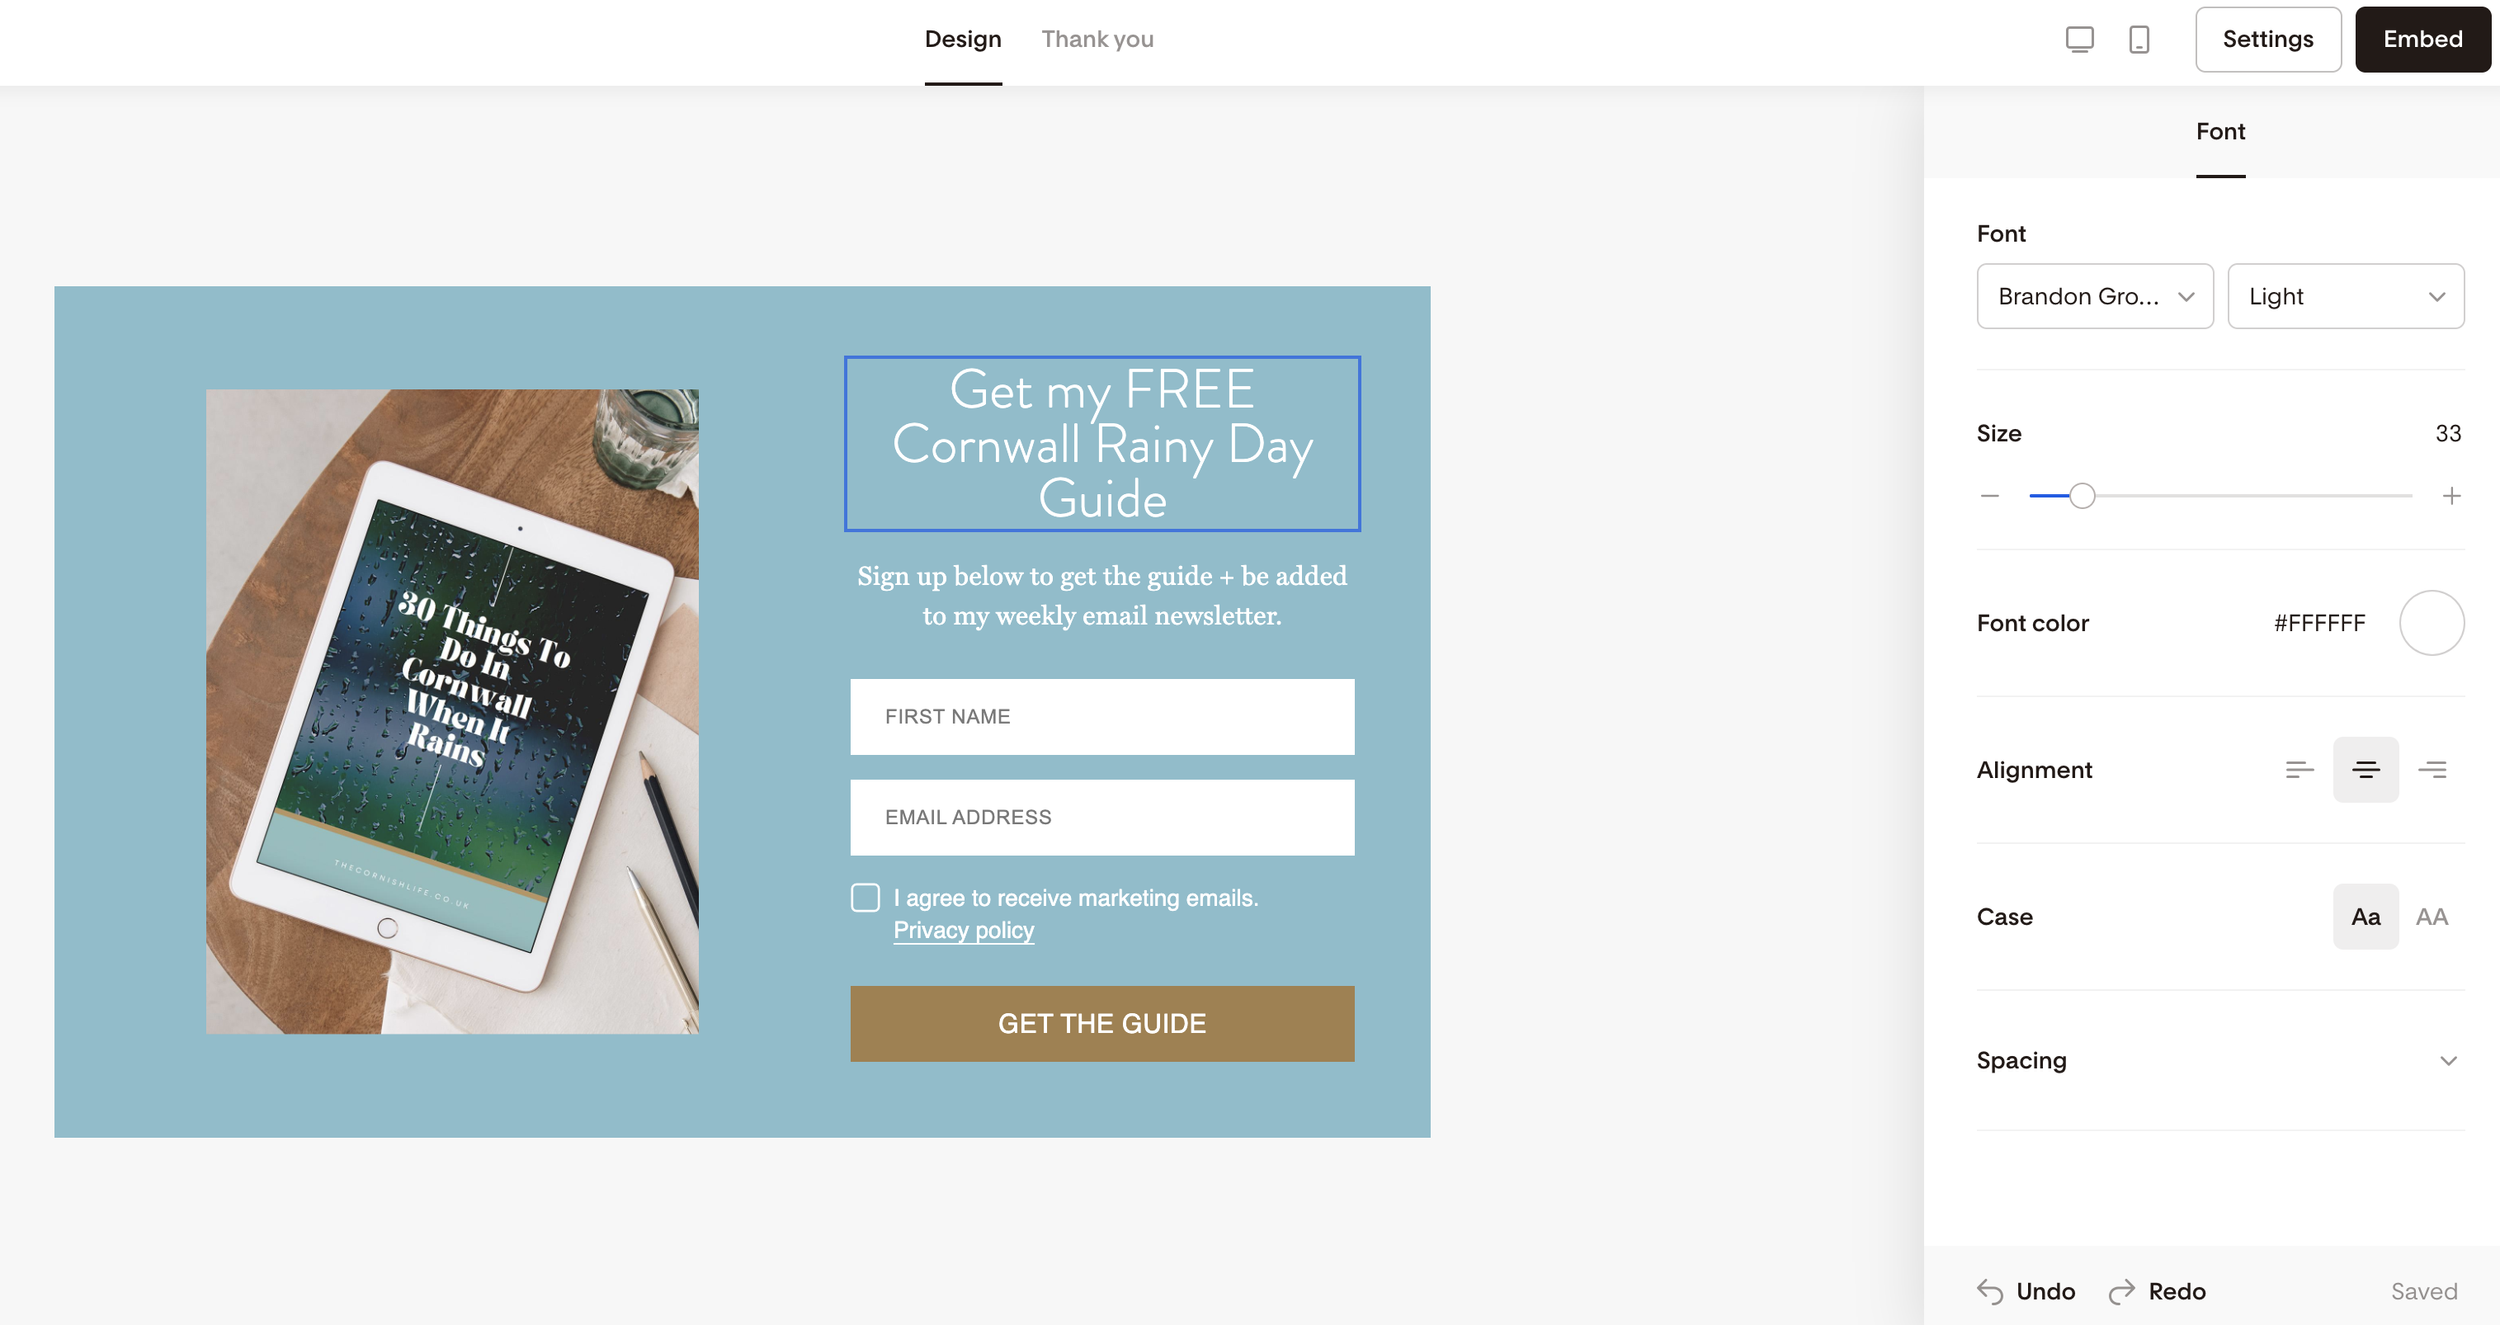
Customise the form, and head into Settings to turn on Privacy Policy (so that this displays clearly on your form) and edit any other settings you need. I usually recommend keeping ‘double opt in’ turned on!
step 3. connect flodesk to your website
Once you have customised the sign up form, click ‘Embed’ and you will see 2 snippets of code.
The first snippet of code is what we need to add to our website to connect Flodesk in the first instance. You ONLY need to do this ONCE, and then for any future forms you do not need to do this step.
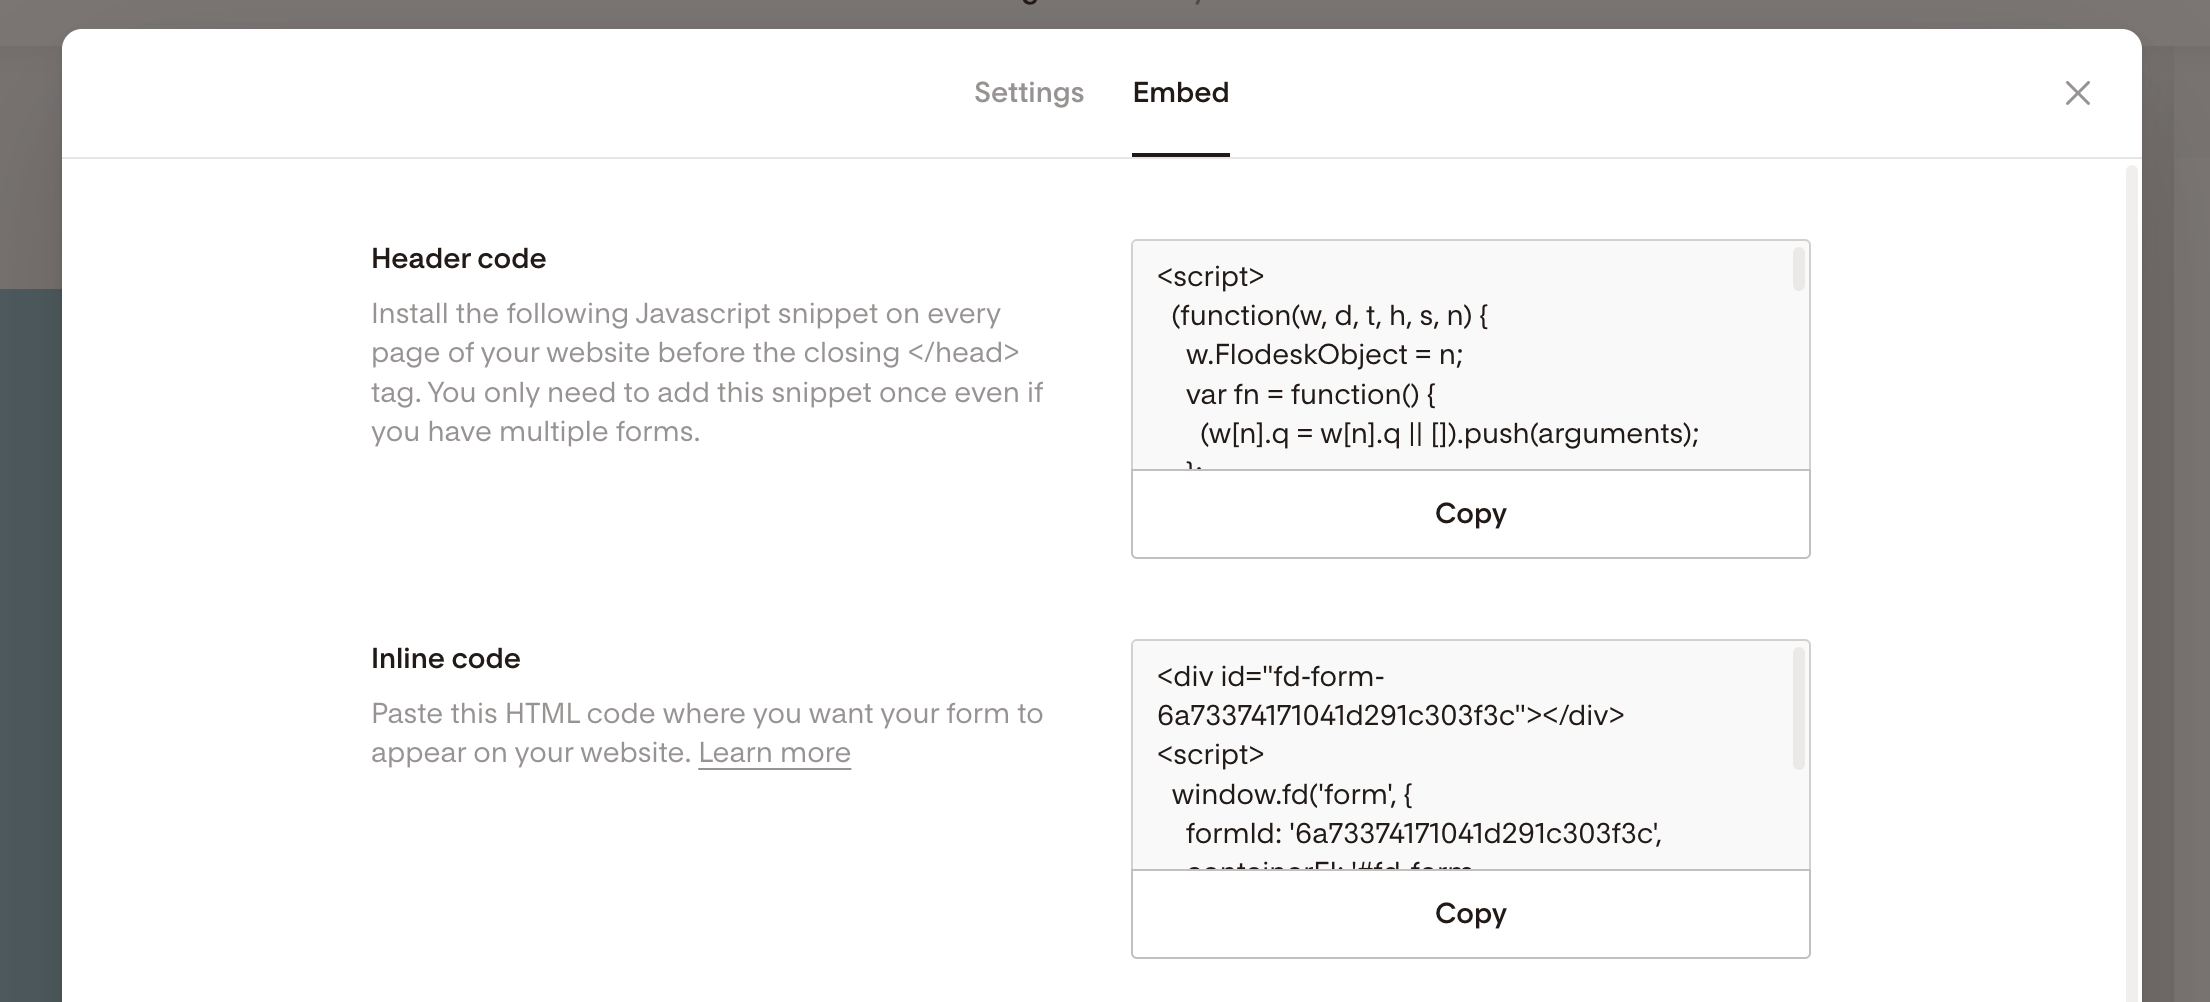
Copy the code, and paste it into the Head/Header code area of your website. Depending on what website platform you use, you might find this in different places. For example in Squarespace, you go to Pages > Custom Code > Code Injection and paste it in the Header Code section. But with WordPress, you might need to install a plugin (eg. AddFunc Head & Footer Code) to then add the code to the Head section.
step 4. embed the sign up form on your website
Once you’ve added that code to your website, the next snippet of code is the actual sign up form, and allows us to embed it on a webpage.
Go to the page you want to add the sign up form to, and add this code snippet into a ‘custom code’ or ‘custom HTML’ block on your page (obviously this works differently depending on the website platform).
The form probably will not load up and display while you’re in edit mode on your webpage, so hit save / publish, and then on the live page you should see it load up!
step 5. test the form!
Test that the form is working by filling in your details, opening your inbox and checking you’ve received the double opt-in email. Click the link in the email to confirm your email address.
Then go into Flodesk and you should be able to see that 1 subscriber (that’s you!) has used the form, and is now in your segment too.
How to set up a lead magnet workflow in Flodesk
step 1. Set up a new workflow ‘from scratch’
Go into Workflows and create a new one. There are templates here but you can start from scratch easily!
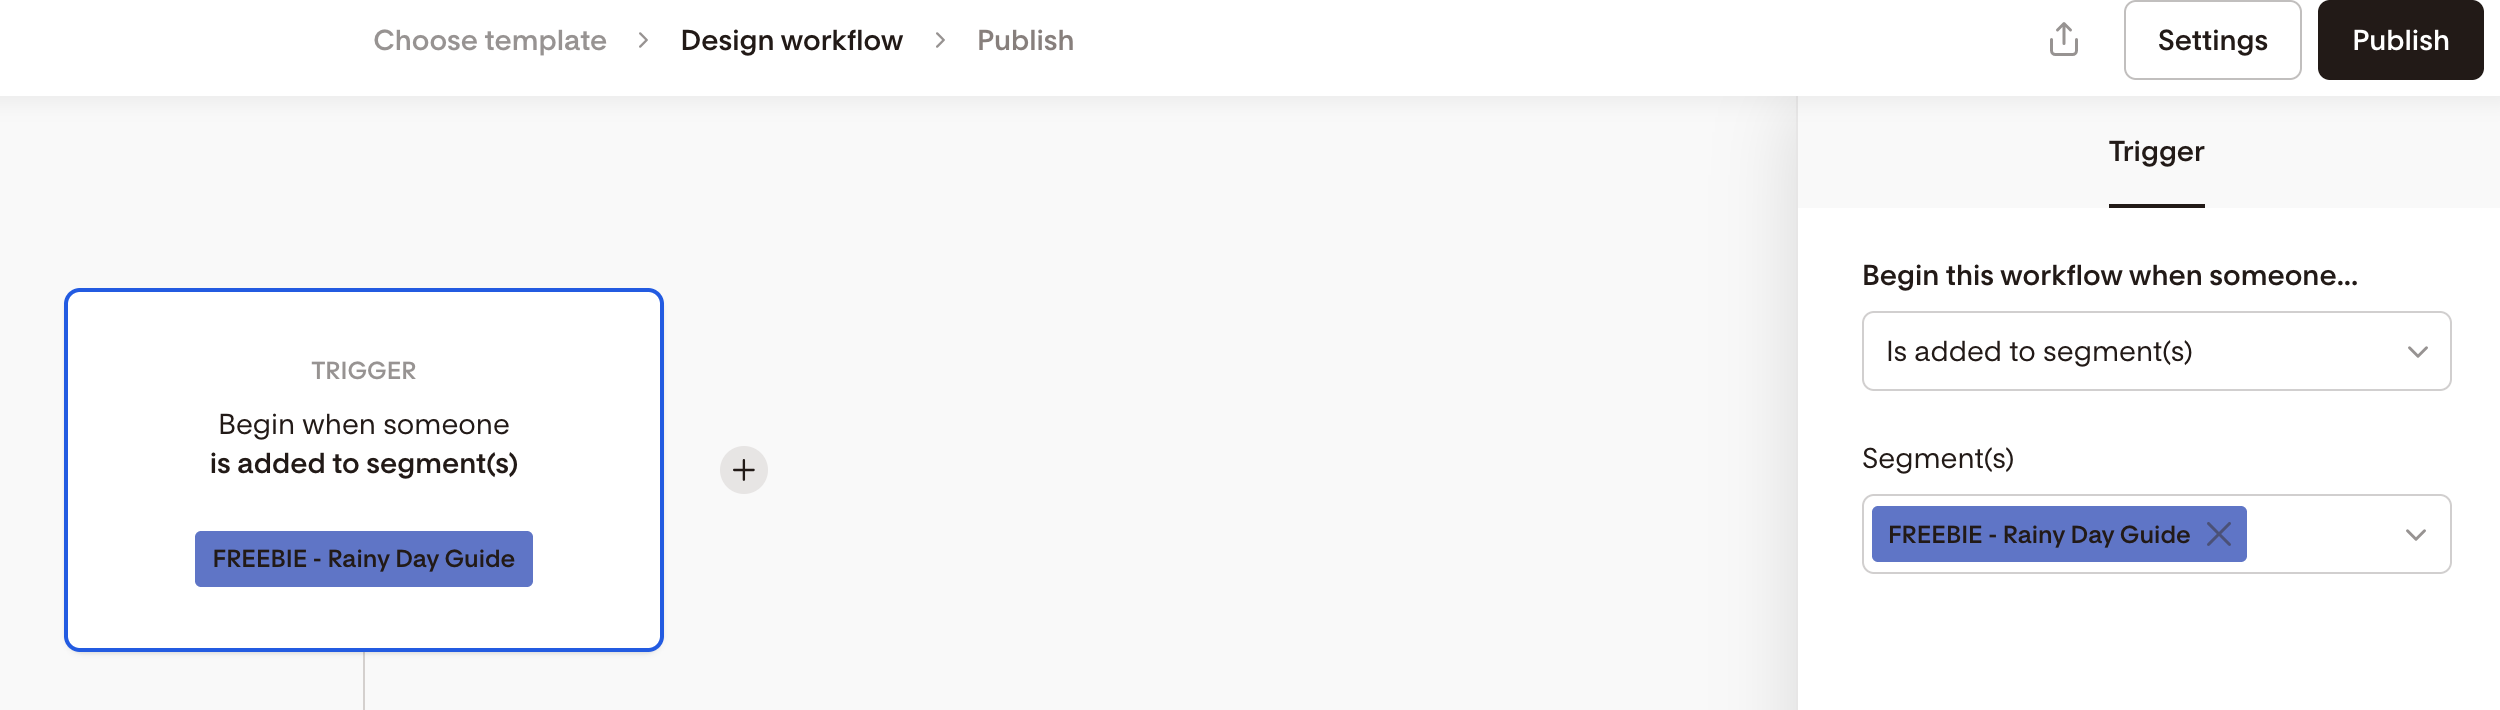
step 2. Set the trigger as ‘subscriber is in segment:..’
The trigger is what kicks off this as an automation! So WHEN something happens, THEN this happens.
The Trigger in this case should be that the subscriber has been added to the segment [CHOOSE YOUR SEGMENT].
step 3. Create & design a lead magnet email
Then click the + button after the trigger, and choose what you want to happen next when someone has been added to your segment! We want to immediately send them an email, so choose ‘email’ and ‘Create a new email’.
I’d recommend choosing one of Flodesk’s templates to start from and customise.
Change the text, edit the styling and design to match your branding, and ensure that there is a button, layout block or link in the email somewhere that links to your freebie lead magnet! You can either paste a url link or upload a file (eg for a PDF).
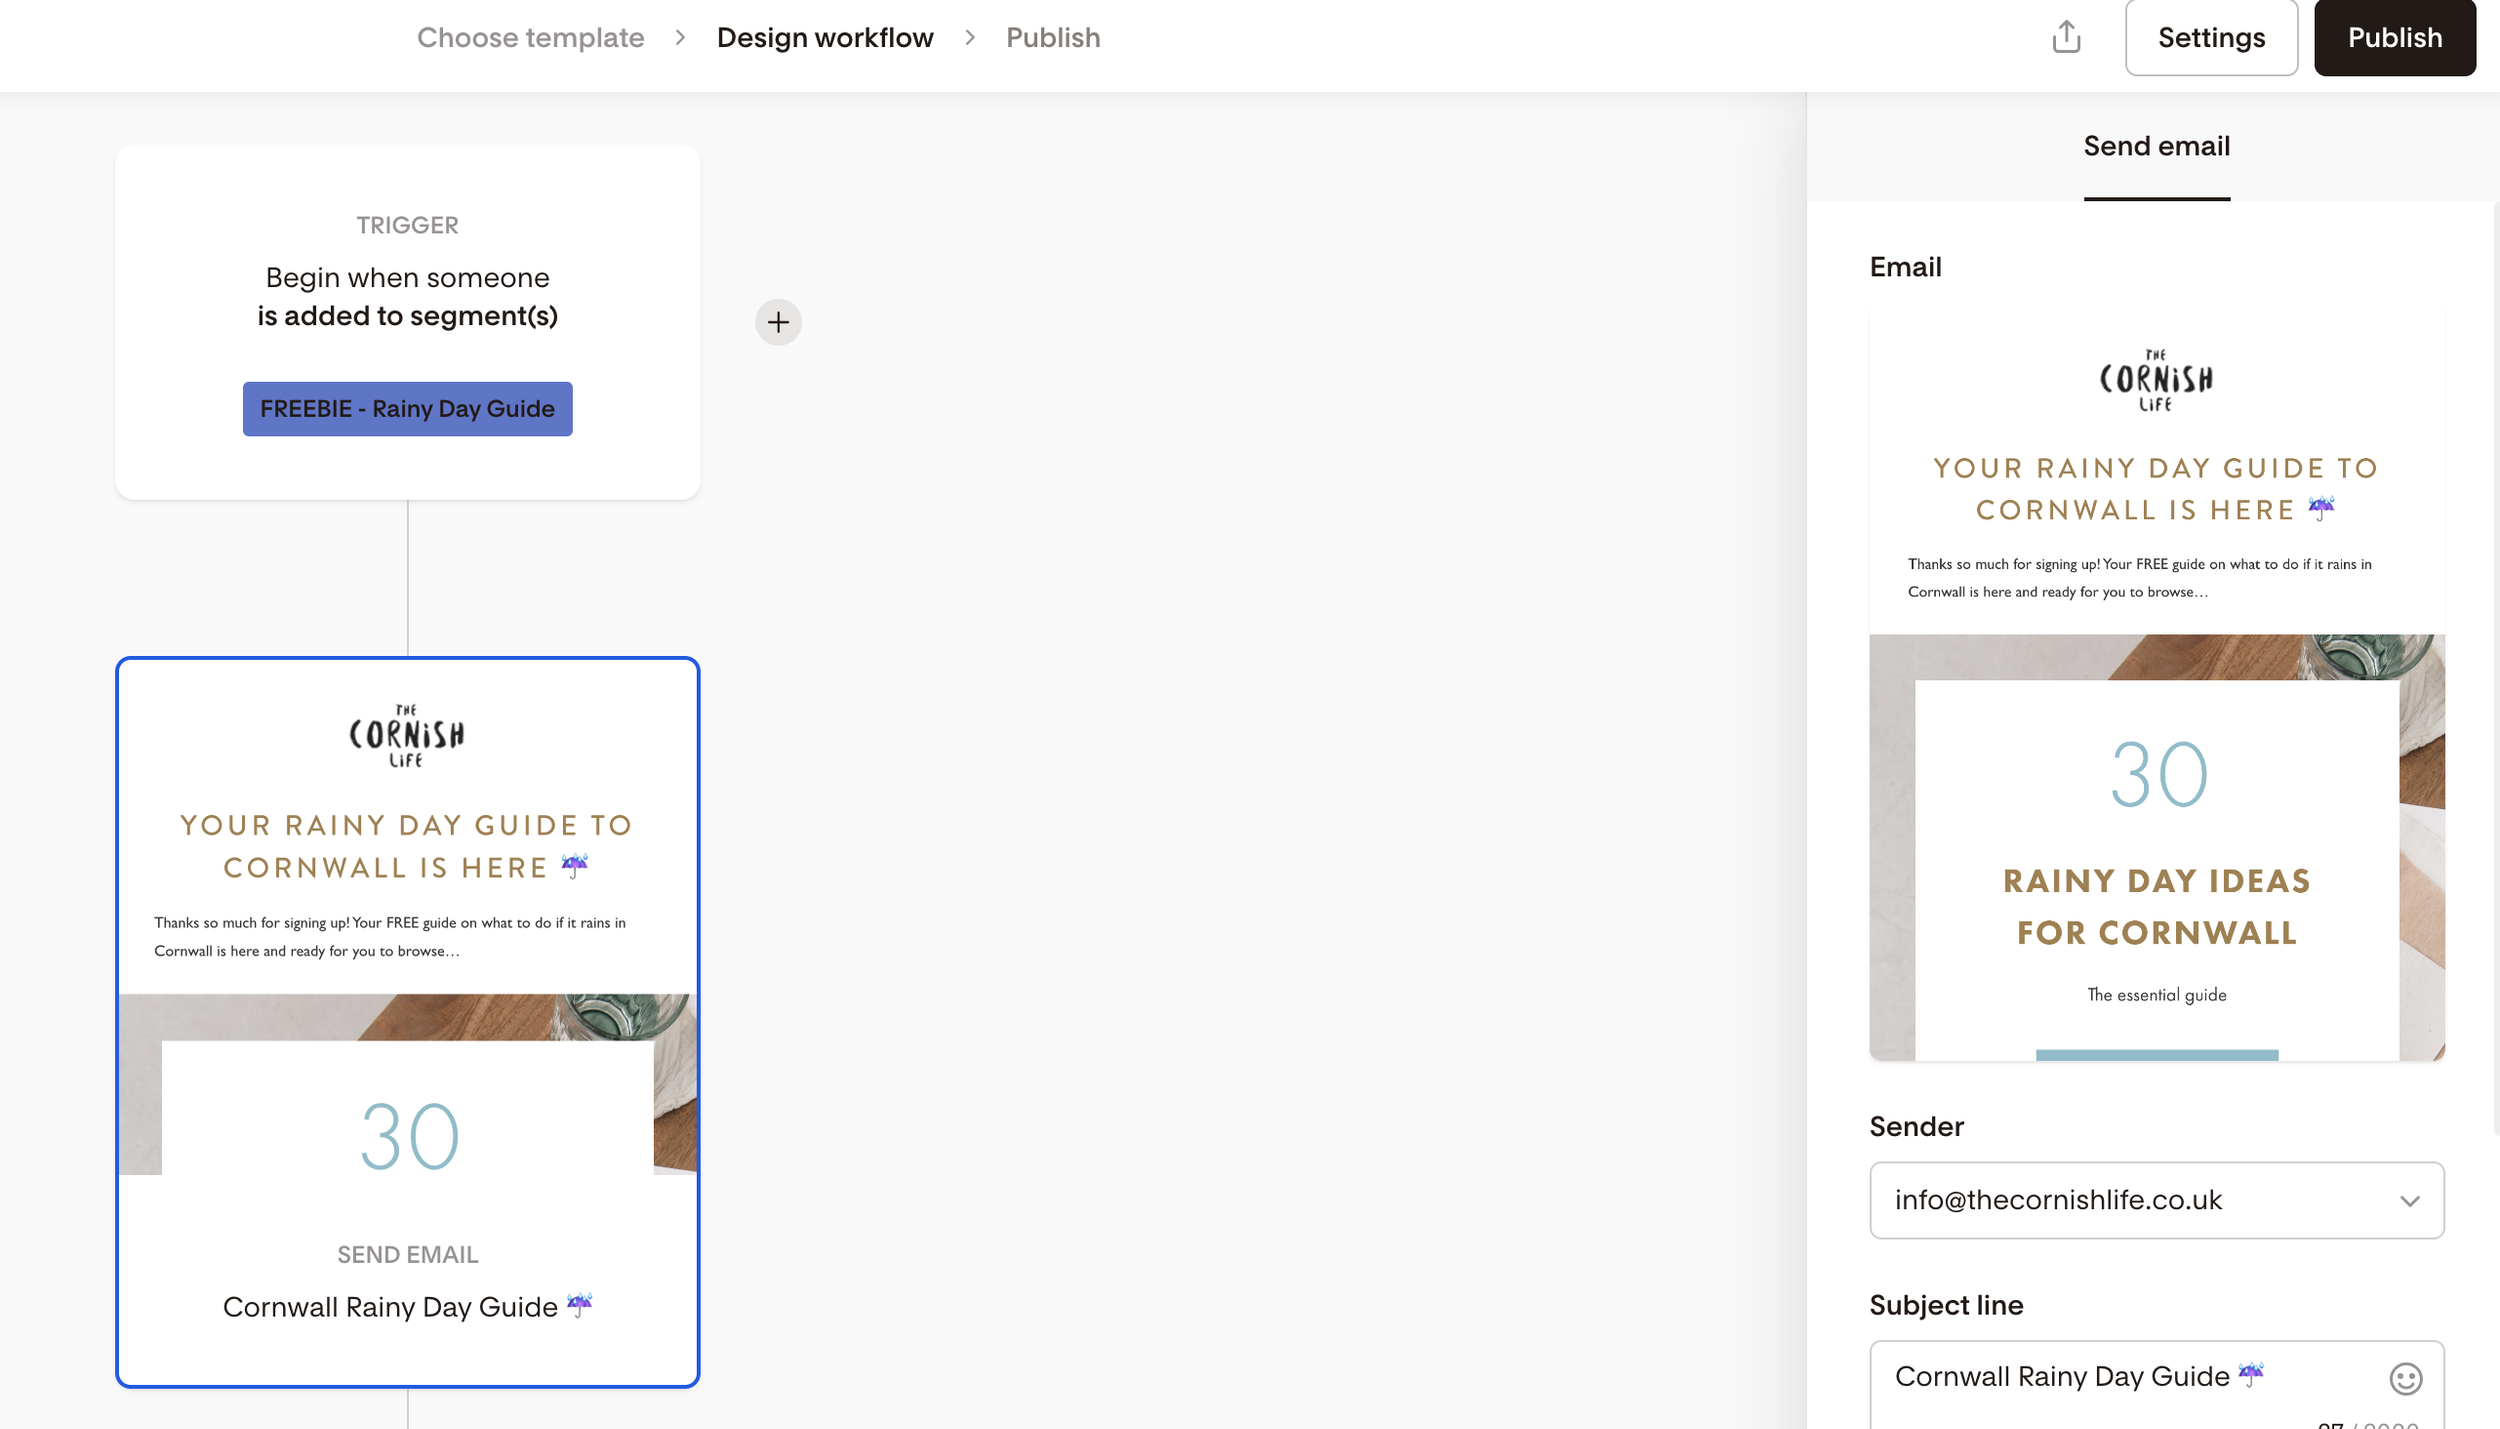
Finish the email and make sure to edit the Subject Line and Preview Text (this is what displays in peoples’ inboxes) on the right hand side when viewing the workflow.
step 4. publish the workflow and test!
Hit publish to make your workflow live and go and test it! Head to your sign up form again, add a DIFFERENT email address to test, confirm your email address in the double opt-in, and once you’ve done that you should automatically immediately also receive your lead magnet email that we just set up in the workflow :) 🎉
How to create an email newsletter in Flodesk
step 1. create a new email in ‘emails’
Go to ‘Emails’ and create a new email. Use one of Flodesk’s predesigned templates as a starting point to customise.
You can go in and click on any element in the template and edit all the design styling settings on the right hand side, plus click the + buttons to add more elements to the email, delete or drag and drop to re-order them. And of course edit all the actual content too!
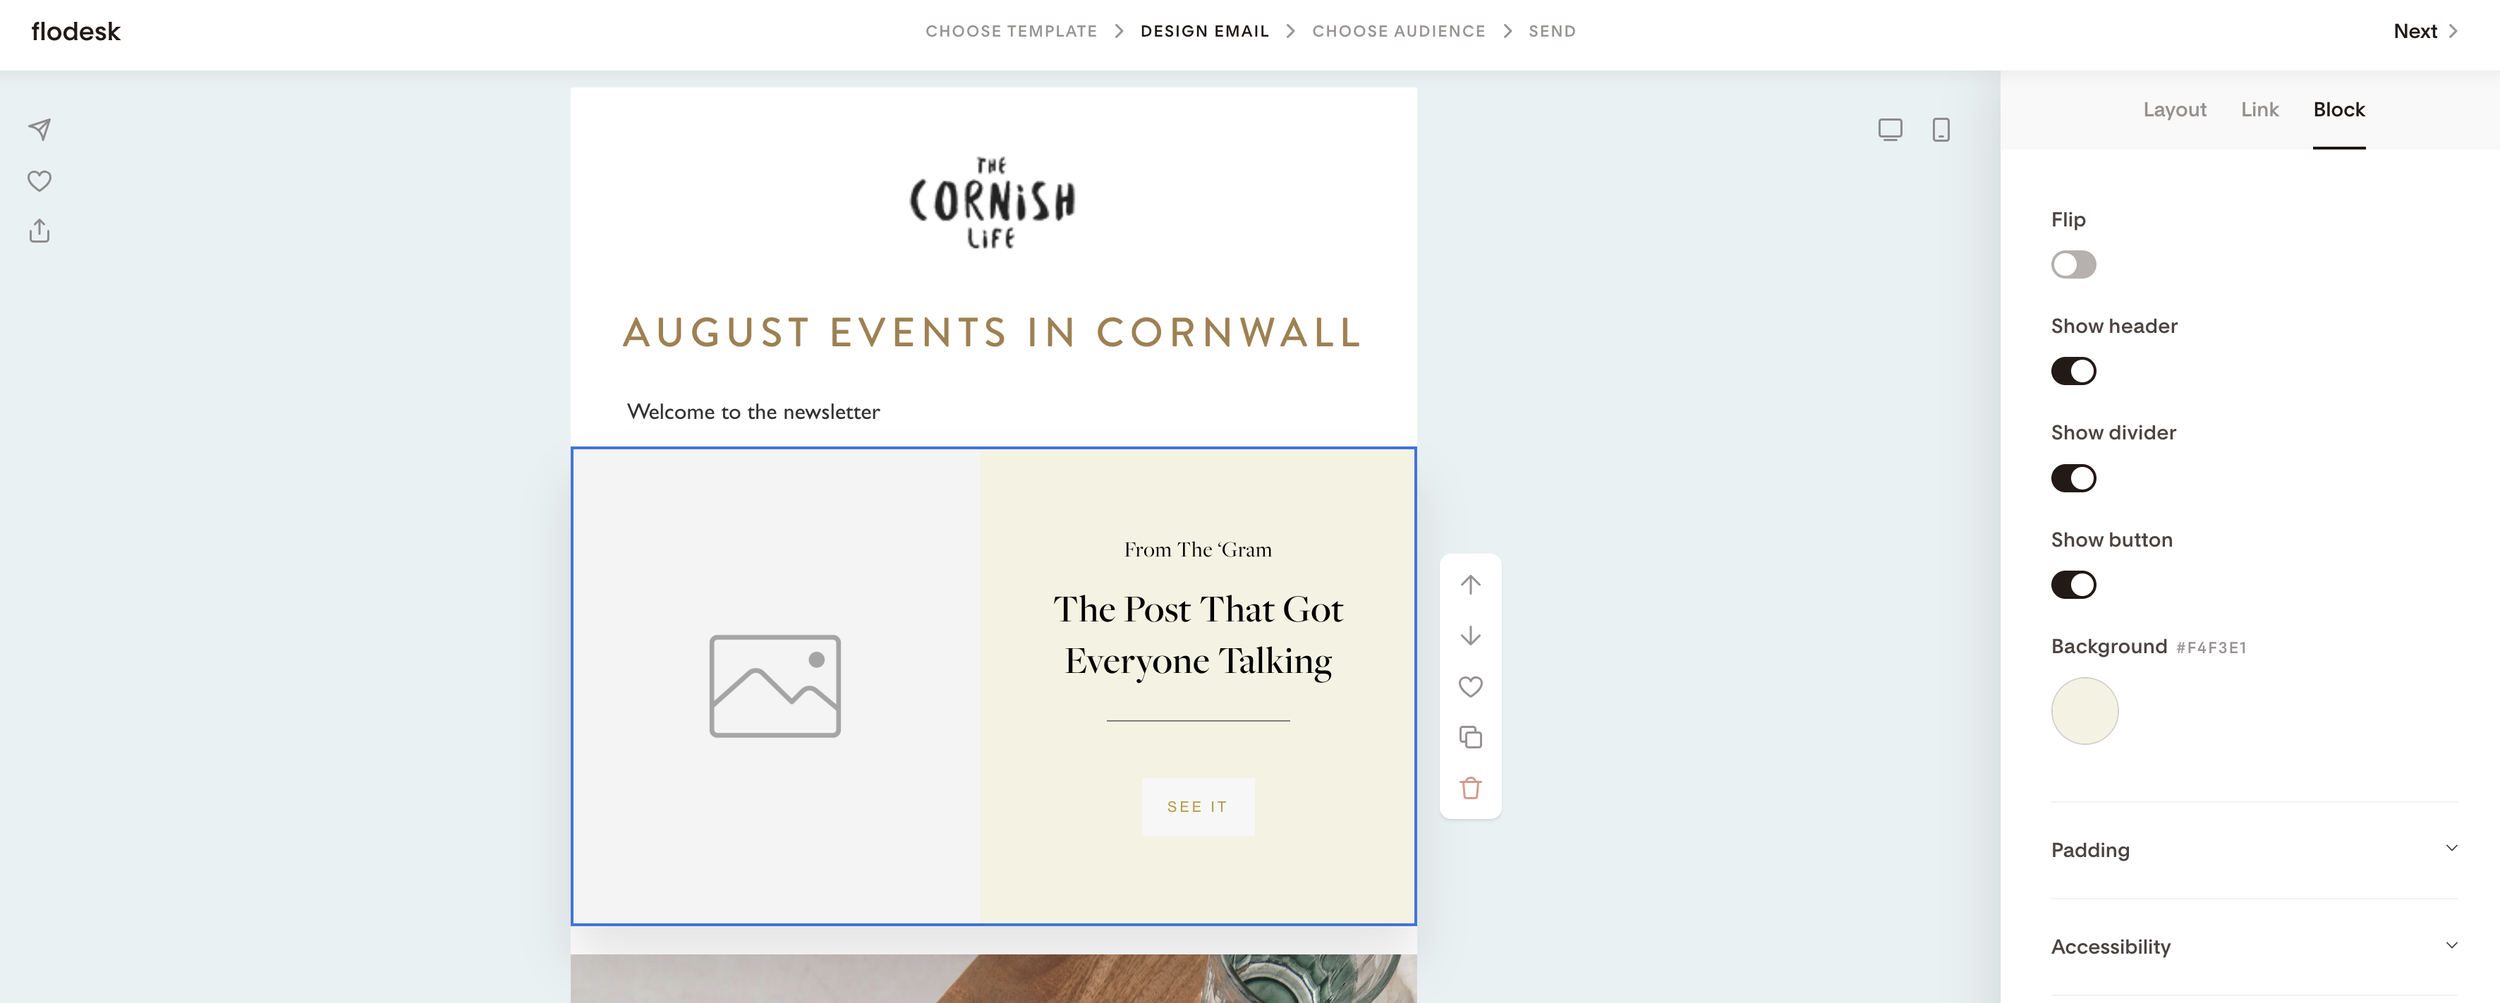
Click Next at the top once you’re done.
step 2. ensure the sender is correct
In the next step, just double check that the sender name and email address is correct (it must be your branded email address that we mentioned before!) and the name is what people see in their inboxes, so make it obvious that it’s come from a name they recognise.
step 3. write a subject line & preview text
The subject line and preview text is also what people will see when the email newsletter lands in their inbox, so make this really attention grabbing, making people want to open the email.
(You can also A/B test email subject lines too!).
step 4. choose the recipients
Choose which subscribers you want to send this email to. Choose segments and you can select ‘All subscribers’ if you wish, OR just select specific segments (you can choose multiple).
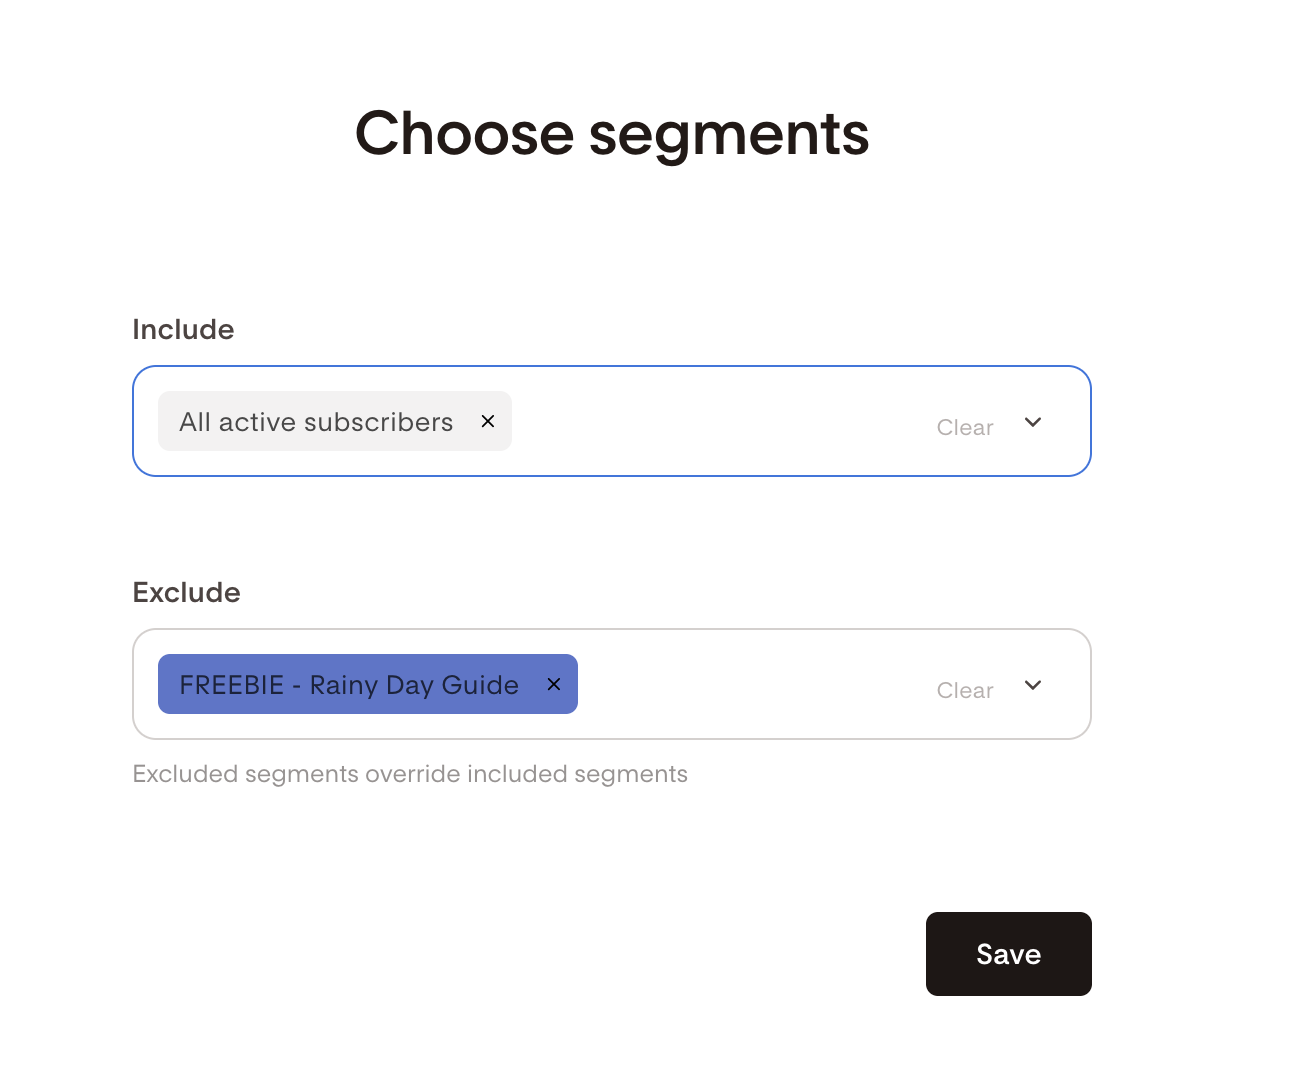
You can also ‘exclude’ specific segments as well, if there’s a certain group of subscribers you DO NOT want to send the email to.
step 5. send or schedule!
In the next step, choose whether you want to send the email NOW or schedule it for later 🎉
Frequently Asked Questions
Do you need a website to use Flodesk?
No! You can start building your email list using the full page forms in Flodesk, which create live web pages for you that don’t require a website, or by creating a ‘link in bio’ form that you can share on Instagram - all without needing a website :)
Does Flodesk give you an email address?
No, you need to set up a ‘branded’ email address with your domain provider before using Flodesk (eg. contact@byrosanna.co.uk is a branded email address set up with my byrosanna.co.uk domain).
What is double opt-in on Flodesk?
‘Double opt-in’ is a feature where if someone signs up to your email list, they will immediately receive an automated ‘confirm your email address’ email where they need to essentially ‘opt in’ again by clicking the confirm button in the email. This means that your list ends up with less spam or undeliverable emails because people it verifies the person’s correct email address and that they actually meant to sign up!
Which is better, Flodesk or Mailerlite?
It really depends on your business and priorities, but I have a full comparison between Flodesk and Mailerlite here.
Which is better, Flodesk or Squarespace emails?
It really depends on your business and priorities, but I have a full comparison between Flodesk and Squarespace Emails here.
How do I integrate Flodesk with Squarespace?
There are several ways you can easily integrate Flodesk with Squarespace and I have a full tutorial here.
Can you sell products on Flodesk?
Yes! Flodesk has a feature called ‘Checkouts’, which is an add-on to their email marketing plan. Here, you can create products, take payments, create funnels, and connect it all seamlessly to your email marketing!
How to get a discount for Flodesk
Use my link or code to get 25% off your first year!
I LOVE using Flodesk’s email marketing software and recommend it to all my clients too, plus as an affiliate partner, I can get my audience a discount on their plans too!
If you sign up using my link (or start your paid plan using my code below), you can get 25% off your first year 🎉
Or use my code (00G2QH) at the checkout when you subscribe to a paid plan for the first time.