

How to Set Up 301 Redirects in Squarespace

Whether you’re moving Squarespace websites, or you’re switching pages or posts around on your existing site, setting up link redirects is a very important step!
What is a 301 redirect?
A ‘redirect’ is when you forward an old url (eg. yourdomain.com/services/option1) to a new url (eg. yourdomain.com/services/option2). There are a few different types of redirects you can set up for forwarding, but a ‘301 redirect’ is the most common and tells your browser and Google that a page has moved permanently (rather than temporarily).
When you use a 301 redirect correctly, it passes the original page’s ranking power to the new page, which means your SEO isn’t affected by the move of pages. Therefore, it’s an incredibly important step to make when changing page URLs!
Why might you need a 301 redirect?
You needed to edit the URL of a page or blog post
Perhaps when you set the page or blog post up, you left out a keyword or made a spelling error, and you’ve just realised! This happens all the time, but don’t just leap straight in, edit the URL of your page and leave it at that. By changing the page URL (even just a small spelling error), it means any old links to that page won’t work anymore. Setting up a 301 redirect telling the old URL to forward to the new, edited URL, avoids this problem.
You have created an updated version of an old page or blog post
If you’ve created a brand new page or blog post with a new URL that renders your old page or post out of date, instead of just deleting that old page, you can set up a 301 redirect to make sure that people are taken straight to the new, relevant page AND this means any page ranking (SEO juice!) from that old page gets passed along too - win/win!
You have deleted an old page or blog post
Again, don’t just go around deleting pages on your website willy-nilly! If those pages are linked to anywhere on your own site or across the web, those links won’t work anymore and people will see an ugly 404 error page. Set up redirects to other relevant pages to help people out.
You are moving websites
Sometimes when you are moving to a different hosting platform or designing a new website, the site map and therefore the URL structures for your pages can change, so it’s important to keep an eye on any changes like that and add redirects (eg. yourdomain.com/services/category/service1, might become yourdomain.com/services/service1. Or yourdomain.com/blog/blogpost1, might become yourdomain.com/blogpost1).
How to set up 301 redirects in Squarespace:
1. Copy the old page’s URL
Head to the old page or blog post, and copy (command + C or right click + copy) the URL slug (eg. the '/services’ or the ‘/blog-article-1’ part of the URL, after the .com or .co.uk part).
2. Go to Settings > DEVELOPER TOOLS > URL MAPPINGS
Head to your Squarespace dashboard and go to your Settings area in the Developer Tools section, to find the URL Mappings option.

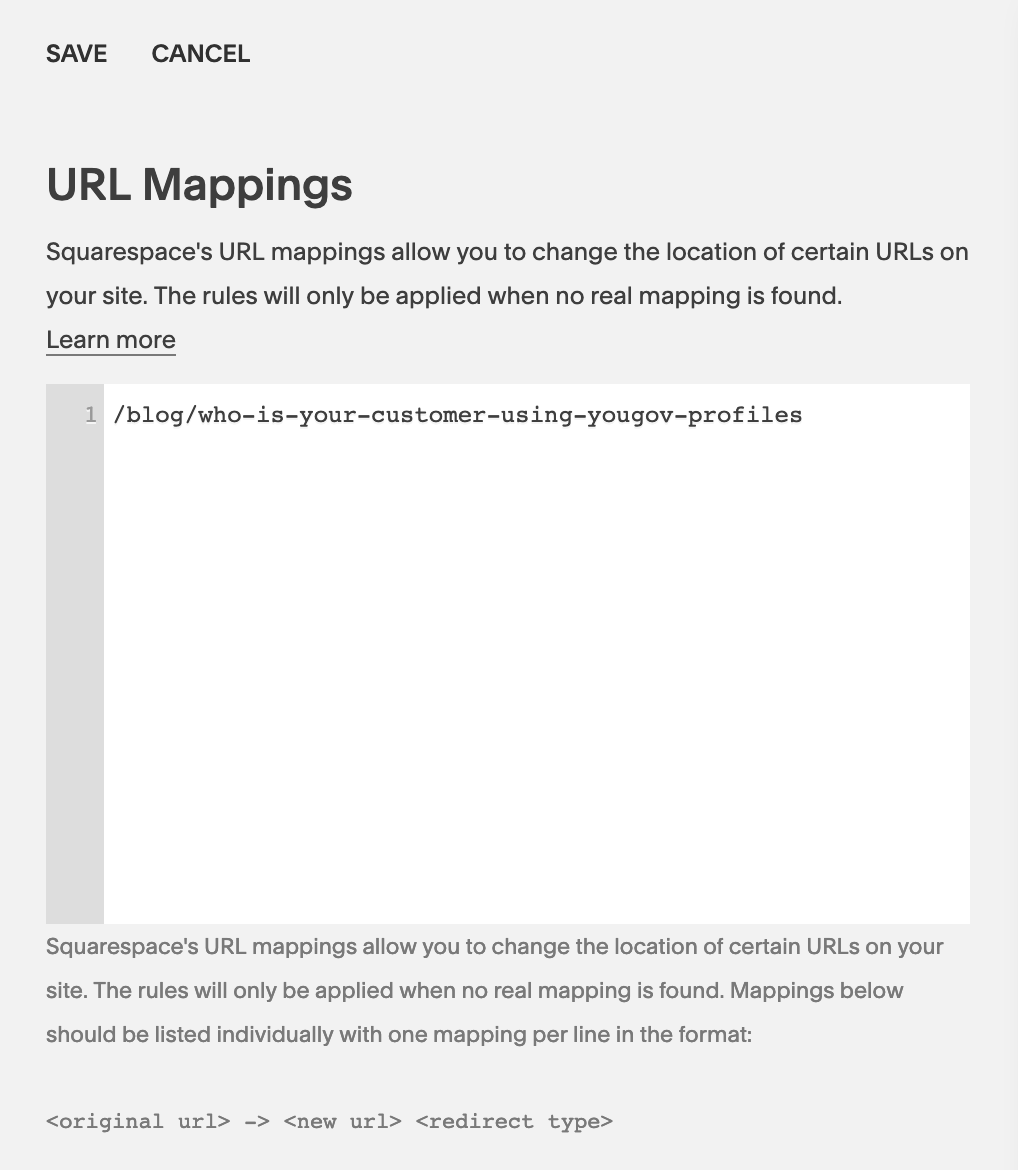
3. Paste the url
There are instructions on how to correctly create 301 redirects on this page too, but all you need to do is past the old URL slug for now, like so:
4. Add the forwarding ‘key’
Use the hyphen and the right-hand arrow punctuations on your keyboard to create the Squarespace ‘forwarding key’, which is basically shorthand for, ‘Now please forward this URL to…’. See below:

5. Copy the new page’s URL
Head to the new page or blog post and copy (command + C or right click + copy) that URL slug.
6. Go back to ‘url mappings’ and paste the new url
Leave a space after the ‘forwarding key’ and then paste in the new URL slug, like so :

(in this example, the new url has automatically dropped to the next line because it’s too long to fit on one line, but you don’t need to paste it onto a new line, just paste it straight after the -> and a space)
7. Finally, add the ‘301’
To confirm that this is a 301 redirect and not a different type of redirect, you then need to add a space and type 301, like so (then save the settings!):

^ This is what your redirect should look like in full.
Watch my quick video tutorial below to see how to do it:
(Please note, the settings have moved since the below video was recorded. You can now find the URL Mappings area in Settings > Developer Tools > URL Mappings. The rest of the tutorial is the same!)
Troubleshooting & Redirect Notes:
Search engines can take a while to register the changes
It can take time for Google to find the redirect, register the new page and change the ranking appearance. There’s no set time period but you can expect to be waiting a couple of weeks at least to see the changes made. If you are waiting for a long time, it’s worth making sure your website is submitted to Google Search Console, as you can prompt Google to index your pages from there.
Keep Redirects organised
After a while you may find that you end up with ‘chains’ of redirects (eg. Page 1 redirects to Page 2, Page 2 redirects to Page 3, Page 3 redirects to Page 4 etc.). Not only does this look messy but it also will dilute the page ranking, so will have a negative impact on your SEO.
Every now and then it is recommended that you go through your redirects and streamline them (eg. Page 1 redirects straight to Page 4) to avoid this.
Make your redirects relevant
Ie. Don’t just redirect old/deleted URLs to your Home page! I know setting these up takes time and that can seem like the easy option, but not only is it bad for your website visitors (if they were expecting your old page to show up and they just go to your Home page, that isn’t very helpful for them) and therefore for your SEO (Google rewards helpful behaviour), it’s also not very useful for you as a business owner too.
That old page should be redirected to something that is as similar and useful as possible for the person who clicked on that link, otherwise visitors are likely to just leave your website straight away, and you’ve missed an opportunity to hook them in with relevant content.
301 redirects only work when the original url no longer exists
If you still have a page that is live using the original url, the redirect will not work. You need to either change the url or disable/delete the page if you want to redirect the original url to a new one.
Easy 301 redirects as shown above only work for URLs on the same domain
Your domain is ‘yourdomain.com’, and all of the information above relates to you simply needing to change the ‘page slugs’ (aka the ‘/services’ part that comes after .com or .co.uk) that all relate to the same domain. You can’t set up redirects for domains you don’t own.
It’s a little more complex if you are changing domains… you firstly still need to have full access to the old domain (ie. you still need to own and be paying for it), and secondly, you need to have some access and knowledge in editing .htaccess files of your domain. You can find instructions below, but you may need to enlist the help of a developer or IT expert:
