Creating Your First Blog Post in Squarespace (Best Practices & Blog Settings)
So you’ve set up a blog on your Squarespace website - but now what?
As someone who has been blogging for over 8 years (here and on my travel blog!), I love how easy Squarespace makes it to create and edit blog posts on your website.
But there are a few common pitfalls I see when my clients are creating their first blog posts and getting to grips with blogging on Squarespace, so I wanted to share my own step-by-step tutorial on how I create blog posts and the best practices for your blog settings too.
Table of Contents
Watch this as a video tutorial! (Or keep scrolling to read)…
1. Go to your 'Blog' section and press ‘+’ to create a new blank post

Once you've pressed the '+', a new draft blog post will be created and it will open up the full-page blog post editor. Here, you need to add a title for your blog post, before adding your blog content below that.

Not sure WHAT to post on your blog? Check out my Blogging with Purpose course, which teaches you how to create a blogging content calendar with infinite ideas for your specific business, and craft SEO-focused articles that convert customers!
2. Add content blocks to your blog post
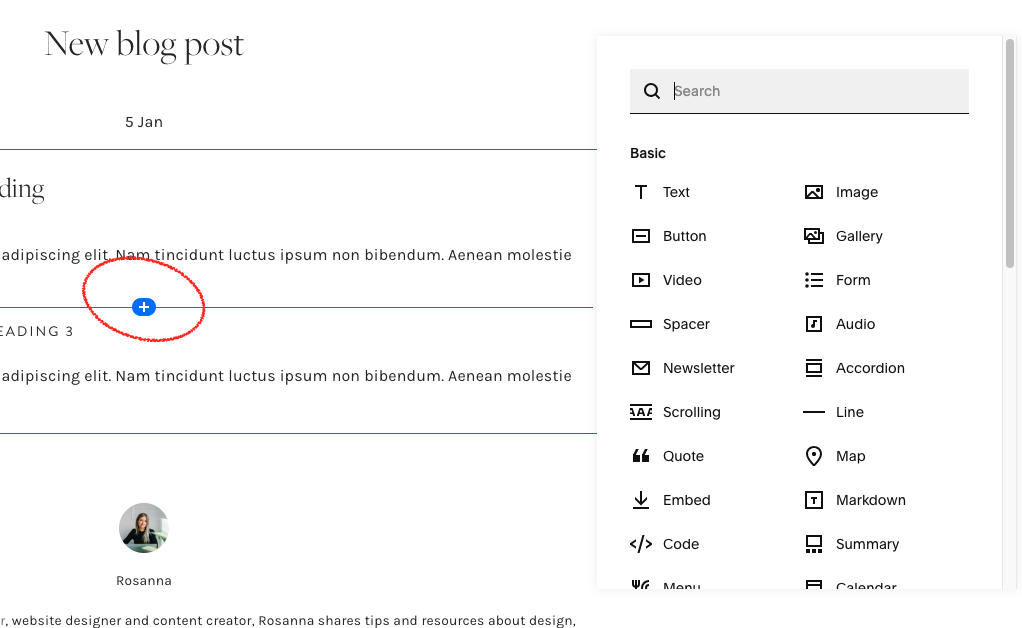
A ‘text block’ where you can start typing will already be added to the blank blog post by default, but you can also click on the blue line/plus buttons to add other content blocks - such as images, galleries, buttons etc. - to the post as well.
You can add as many as you like to build out your blog post!

Adding images to your blog posts are a great way to break up large chunks of text. If you add an image block, you’ll be shown a pop-up where you can upload your own graphics or photos, or choose from Squarespace’s free stock photography library.
Be sure to add ‘alt text’ when you upload an image, as this is what screenreaders will read to people accessing your website who are blind, and Google can also read this as well, which can help with your SEO.
Learn more about how to use and format images properly for your website in this blog post.
3. Structure your post with headings & subheadings

People don’t have the time or patience to read through large blocks of paragraph text, which is why it’s so important to break up your blog posts using different headings and subheadings - for example, this blog post you’re reading now!
You can use the text editing options on your Squarespace blog to use Heading 2, Heading 3 and Heading 4 to add subheadings through your blog posts to create a clear structure for the article.
It’s also great for SEO as it gives Google more context to understand the structure of your post too!
I share exactly how to structure your blog posts for SEO and for converting customers inside my Blogging with Purpose course.
4. Save your post as a draft & exit before you hit publish!
This is really important - you DO NOT want to publish your blog post straight away after you’ve finished adding the content, because there are some important settings we need update on the post first.
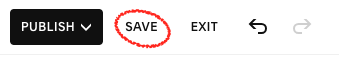
Instead, click ‘save’ and ‘exit’ in the top left corner, and this will save the post as a draft.
5. Blog post settings: featured image, excerpt, url, categories and SEO

Hover over your blog post on the left hand side, click the 3 dots and select ‘Settings’.
This will open up the blog posts settings, which are really important for you to edit before you hit publish!
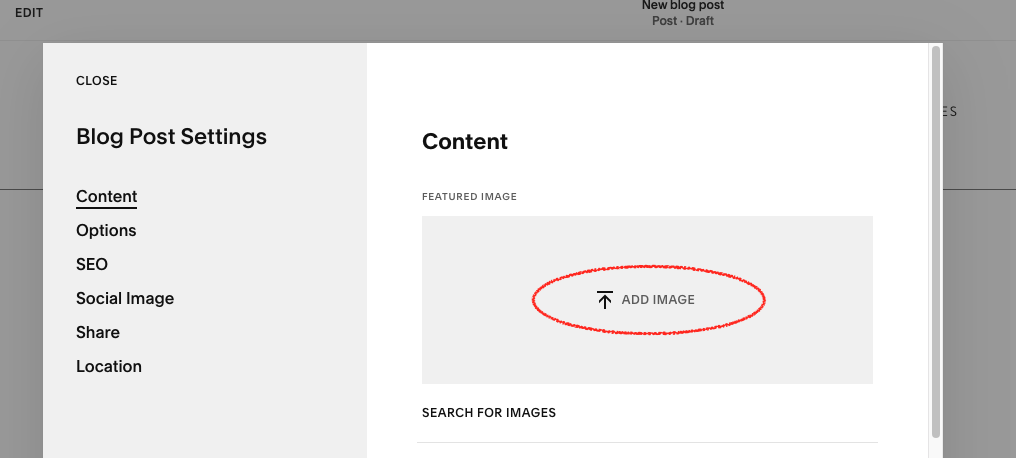
1. Add a featured image
The featured image (also known as a ‘thumbnail image’) is what displays on your blog feed page. If you don’t upload a graphic or a photo here, only the blog post’s title will be displayed on your blog post, which just doesn’t look very appealing or ‘clickable’ when someone is browsing through a list of all your blog posts!
I like to create my blog thumbnail images as graphics in Canva, but you could upload photos here as well.

2. Edit the post excerpt (if relevant for your Squarespace design)
An excerpt should just be a short sentence or two describing what your blog post is about / what people can expect from reading your post. It will be displayed on your blog feed page on SOME Squarespace blogs, but it depends on your blog/website design.
Sometimes, Squarespace websites are designed not to have the excerpt display (like mine!).

3. Edit the post url (If needed)
Automatically, Squarespace will generate your blog post url using the title you’ve given to the blog post, but sometimes you may want to shorten or edit this if it is very long.
Your blog post url will always contain ‘/blog/’ first (or whatever you have called your blog post - it could be /news/ or /journal/ etc), so you cannot edit that part.

4. Add the SEO title & meta description (SEO tab)
In the blog post settings, click on the ‘SEO’ tab, and here you will be able to edit the blog post’s SEO title and description. If your blog post gets ranked on Google, this is what will show up as the preview on Google.
If you don’t fill this in, Google will just display your blog post title (this is usually what you would want as the SEO title anyway, if you have included keywords and researched your blog post title properly - as I show how to in my Blogging with Purpose course), and the first few sentences of the blog post as the description.
6. Select your blog post’s categories
Blog categories are a way of categorising the types of blog posts you typically create. When you create categories, you can then add a category filter (using an ‘archive block’) to your blog for your audience to select which categories and topics they’re most interested in - like mine:

To create a category, go to the Options tab in your blog post settings and click ‘Categories’. You can start typing here and it will either show you the existing categories you have, or you’ll be able to create a brand new one from here, and assign it to this blog post.

I have been blogging for 8+ years which is why I have quite a few categories, but typically I’d recommend starting off your blog with no more than 3 - 5 categories. If you’re not sure what types of categories to choose, I cover this inside my Blogging with Purpose course.
If you need to edit or delete categories on your blog at any point, you can do this inside the blog settings (for the whole blog, not an individual blog post), if you click on ‘Advanced’ and then ‘Manage Categories’.

Do I need to add tags to my blog posts?
Tags are another way to add context about the type of blog post you’re creating, and can also be another option for your audience to use for filtering (using the ‘archive block’), but I typically don’t use these.
Categories are more important so I would stick to using those!
What about the other blog post settings?
There are some other settings you can play with in your individual blog posts, such as enabling or disabling comments (this is up to you whether you want to allow comments or not!), or uploading a specific social sharing image (an image that displays when you share a link to the blog post on social media - but Squarespace will use your ‘featured image’ by default so it’s usually not necessary).
You can ignore the ‘Share’ and ‘Location’ tabs as well in the post settings - in 8 years I’ve never used these and they’re kind of unnecessary for most of us!
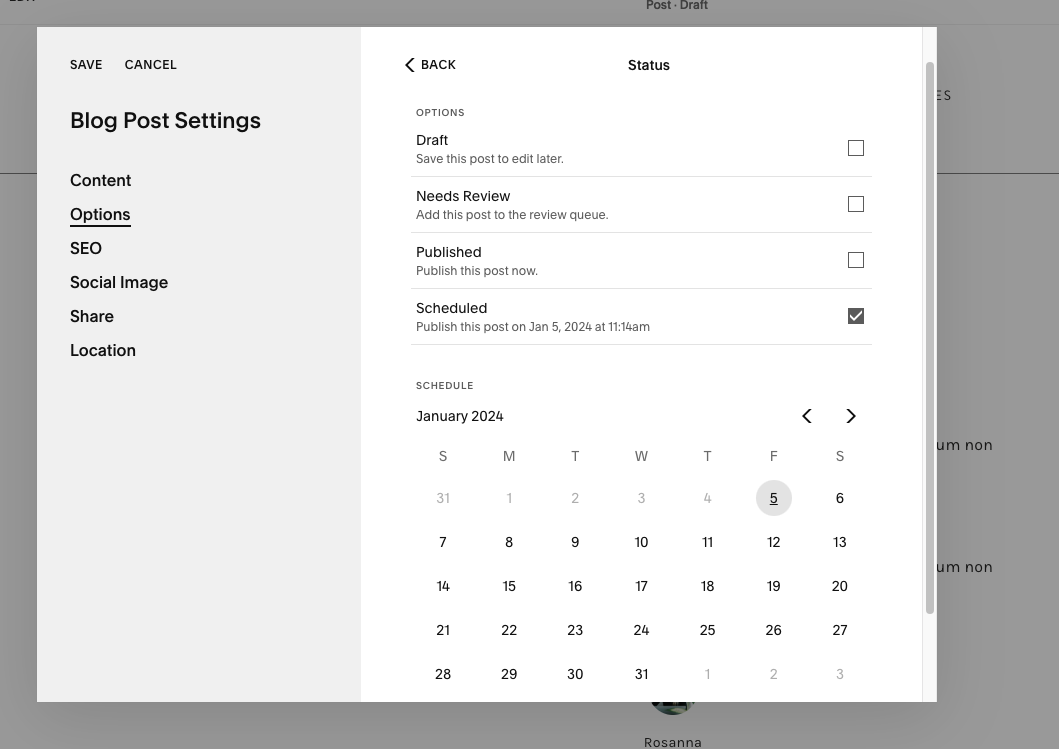
7 . Schedule your blog post or publish straight away!

Once you've finished updating all the settings, your blog post can be ready to publish! If you go into the ‘Options’ tab and click on ‘Status’, you’ll see you have the option to publish the blog post straight away (if you select this and then click ‘save’ in the top left, it will publish your post immediately), or schedule it to publish automatically for you at a set date and time in the future - it’s up to you!